INTRODUCTION
Audio Accessories can be critical for optimizing a system, but extra care should be taken in this category since this has been the proverbial "playground" for audio con artists and extremists.
For every worthwile accessory, there has been an equivalent fraud, rip-off or something that appears to have been designed by a lunatic.
KINETIC SYSTEMS 2200 SERIES ISOLATION BASES- These are very expensive, but they are probably the finest isolation bases available at this time. They were made to isolate electron microscopes. The 2210 is passive, requiring a manual pump to be used periodically to level it and retain the isolation. The 2212 does this automatically, but you have to provide the electronic pump. The 2214 is also automatic, and adds greater horizontal isolation.
FURTHER: The 2210 and 2212 models are also called "Vibraplanes" by the U.S. audio distributor, Sounds of Silence. Unfortunately, their prices appear to be considerably higher than the (now unavailable to audiophiles) direct prices from Kinetic Systems, the actual designer and manufacturer. If there are any differences between these respective models, other than cosmetic, I'm not aware of them.
BLACK DIAMOND RACING CONES- The best cones available for the money. Try them under everything you can.
VARIOUS ISOLATION BASES- Townshend Seismic Sinks or Bright Star bases. Acoustical isolation should be a priority for everyone, no matter what, or where, your system is.
Note- There is a new Seismic Sink model (called the 3D) that is using advanced technology similar to the Vibraplanes, for a fraction of the price. The distributor claims that this updated model "improves on the (still available) original as the original improved on nothing." We may even get a "loaner" in the future.
HERBIE'S TUBE DAMPERS- I highly advise using them for all tube preamplifiers and power amplifiers, though the largest improvement, meaning the most easily noticeable and musically important, will be damping the tubes in the RIAA phono stage of the preamplifier. It's possible that a tube moving-coil stage could be improved even more, but I am not in a position to make that observation.
While the details of my initial observations (maybe of which 75% I would still agree with) are in "My Audio System" (in the "Recent" File), I can state that, in general, the dampers will improve the sonics in three basic areas; the music will be more focused and precise, the sound-floor will drop a little and there will be a noticeable reduction in distortion. I can't state that putting the larger (and more expensive) dampers on an amplifier with multiple output tubes will be worth it, but since Herbie allows a 90 day trial period, with a full refund if not satisfied, I would put them on everything and then figure out later whether the costs and audible benefits match up. One of my closest associates helped me in this assessment and he agreed with my conclusion.
Caveat- I had one result from using the dampers that I didn't expect and which confused me and another audiophile friend. While the reduction in distortion and superior focus were obviously welcome, there was also initially a tendency for the music to sound "lean" and "bland" by comparison to the original undamped tubes. So I started taking the dampers on and off, not being happy with either alternative. Then my "associate", mentioned above, paid a visit, also heard the described differences, and asked me to lower the VTA. This proved to be the solution to my dilemma. I was finally able to retain the sonic strengths of the dampers and get back the "missing" decays, body and harmonics. I was amazed that my VTA was off (even very slightly) for years, even though the final results were preferable.
This experience might not be common to most users, but since I (unknowingly) compensated by altering the VTA in an attempt to "correct" the audible distortions with undamped tubes, someone, somewhere, may also have done something similiar. So I would play around with the VTA before I gave up on the dampers if my observations appear disturbingly familiar.
"SANDBOXES" (CUSTOM MADE)- These were designed for isolating my speakers and bass amplifiers. I used them for years while I was in Toronto, and had a new batch of them built this year. The improvements I/we heard were easily noticeable: in the areas of purity, reduction of smearing, increased intelligibility, transparency, immediacy, image focus, a lower "sound floor" and in the enhanced separation of the musicians, at all volumes.
I paid $ 55 each for the finished boxes, plus the cost of the silica (ashtray) sand and (4 Coincident Speaker) spikes (per box) along with their inserts. Surprisingly, the one improvement I was most looking forward to, an increased image size due to the main speakers being raised a total of 6", ended up being noticeable, but not sonically or musically significant.
Building Instructions- Start off by measuring how large the basic "platform" must be for the component, including speakers, to fit on without any danger of the component moving off the edge. Let's say it's 15" by 20". That particular platform must then "float" on sand within a larger box. The INSIDE of the box must be 1/2" larger in each dimension, because you don't want the platform to ever touch the box itself. So the inside of the box must measure 16" by 21". The inside of the box should be at least 3" deep. So if you are using 1" thick material, the sand will be 2" deep. The platform will also be 1" thick and so will the bottom of the box, making the exterior height of the box 4". If you required a 3" depth of sand, a 50% increase, the exterior height of the box will be 5". The exterior dimensions of this particular box would be 18" by 23" by 5".
Once the box is made and finished (I used flat black paint myself), spike inserts must be installed on the bottom. Care must be taken to make sure the drill doesn't go through the 1" base. This must be done BEFORE the sand is poured inside the box. Then comes the tedious work of leveling the platform in the sand and also making sure there are no "spaces" on the bottom of the platform without contact with the sand. The final task is filling the 1/2" gap between the platform and the interior walls of the box with sand as close to the top of the box as possible, to make sure the platform is both stationary and damped horizontally.
Dimensional Summary of Hypothetical "Sandbox":
1" MDF material used throughout
Floating Platform: 15" x 20"
Inside dimensions of container: 16" x 21" x 3"
Exterior dimensions of container: 18" x 23" x 4" (for 2" depth of sand, so increase the height one inch for 3" of sand)
MONSTER CABLE HTS1000/2000 REFERENCE POWER CENTER- A fantastic value for the money. It improves virtually everything, though subtly, except for amplifiers and tube-analog at late night.
Video and telephone reception is also enhanced, with the appropriate cables included as extras. There is even a $ 100,000 "warranty" for connected components that are damaged by AC surges etc. The 2000 has 4 extra outlets. One of the best values in audio.
It is highly ironic that Monster Cables best products have never been their cables.
Further Information- A reader sent this information to me which may prove very useful to readers looking for an even better deal on this already excellent-for-the-money power "conditioner", especially if they live in Canada.
"...I noticed... the (Monster) HTS-1000 (is in) the Reference Components list. I know it made a clearly audible difference in my system of only modest quality. I just wanted to let you know that it has come to my attention that the Monster PC-1000 uses the exact same circuitry and can be found on the Internet for substantial discounts compared to the Monster HTS-1000.
For example, "www.hcmaudio.com" is selling the unit for $59.95 USD, and they apparently ship worldwide, and many other sites are selling it for a similarly low price, but many don't ship to Canada. Since a Monster HTS-1000 sells for about $320 CAD plus tax here in Toronto, I think your Canadian readers may be especially interested in this information." (3/04)
PS AUDIO POWER PLANTS- A "true confession": Almost every line conditioner I have used has ended up being a big disappointment. Some of them may have had minor sonic advantages, but essentially all of them had even greater sonic problems, especially when used with power amplifiers. (The appropriate cliche- "The cure was worse than the disease.")
These PS Audio designs are not "line conditioners", but they definitely "work", though with reservations. Their first model, the P300, only worked with sources, both digital and analog, preamplifiers, and very low-power amplifiers. The P600, P1200 and larger models will work with most power amplifiers.
They operate by having a dedicated amplifier create an entirely new 60HZ/117v AC signal. The "Multiwave" feature alternates the AC frequency, first 50 HZ, then 150 HZ etc. The only difference between the models is the wattage available. All these models become extremely hot when in use, but they are also very quiet. They are well made, especially for the money.
Based on our recent experiences, our current advice is:
Unconditional Yes- Virtually all digital and analog sources, especially turntables.
(Most) Unlikely- Power amplifiers and preamplifiers (especially tube and especially after Midnight).
Multiwave- Minor improvement at best, many times inaudible. Not for turntables.
These advisories are for systems with good to fair electricity. Audiophiles who live in a large apartment building, or with very serious AC problems, may get more positive results. In short, the better your electricity and/or the power supply of the component, the less benefit you will receive, which is really stating the obvious.
There will be some circumstances (especially tubes, analog, very late at night listening) where there will be actual sonic degradations using these devices. Fortunately, PS offers a generous trial period for potential customers.
Caveat- I have been informed that the "overseas" (220 volt) models use another (step-up) transformer at the output to create the required voltage. This extra transformer may compromise the performance of these units compared to their North American equivalents.
COINCIDENT POWER CORDS- Audiophiles should be very wary of claims concerning power cords. Many, if not most, of them are complete frauds, consisting of no more than an ordinary, medium gauge, power cord you can buy at any hardware store, with the only differences being "designer colors" and (maybe) hospital grade connectors.
So a $ 5 cable, in "taupe", with (maybe) $ 15 dollars worth of connectors, becomes a $ 500 Audiophile power cord. Even a "carny" can learn a lot from these power cord "manufacturers".
The Coincident power cords actually work. They reduce the background sound-floor of the system, and allow more of the subtle aspects of the music to be heard. The sound is also more immediate. The improvements are noticeable, though not "dramatic", except in rare circumstances. They are well built and fairly stiff. They cost $ 275.
The only other power cords I know that work well, and don't cost a fortune, are from Wireworld and Transparent Audio Marketing, which include "filter boxes". They are almost as expensive (if purchased new) as the Coincident, but they don't make quite as much of an improvement.
There are no secrets, magic or voodoo involved with these power cords. The reasons for its superior performance are straightforward: Very heavy duty, low gauge 6n copper; total symmetry for hot and negative; extraordinary shielding for each "leg" plus the entire cable, Hubble connectors and a very high density shrink wrap and braid are used to reduce micro vibrations and resonances.
While power cords can make a difference in most high quality systems, it is usually subtle. Signal carrying cables almost always have a higher priority.
A more recent comparison of power cables was completed in 2016. The review can be read in a dedicated file: Reference Power Cables
"COMMERCIAL" AC OUTLETS- These are "heavy duty" outlets that are available, at a reasonable price, at Home Depot or their various competitors. They make a subtle improvement by slightly lowering the sound-floor and purifying the sound. This observation was verified by some of my associates. I have no direct A/B experience with "hospital grade" outlets which cost quite a bit more.
Warning- I wouldn't change the AC outlets personally if you don't know what you are doing. It's preferable being alive and using the domestic outlets already in your home.
TopThere is a dedicated file on Ultra Sonic Recording Cleaning which has now been posted. It will be updated and further edited as soon as I receive new material from one of the contributors. Below is the link:
Audio Intelligent makes a (necessary) variety of record cleaning fluids, some of which require (a time consuming) three steps. I decided that based on my current degree of patience, plus the nature of my record cleaning machine, the Clearaudio Double Smart Matrix (which cleans both sides of the LP in one operation), I would try out only their Formula No. 6 (a one-step cleaner) and their Formula No. 15 + Ultra-Pure Water* combination (their best two-step cleaners). So far, I've only used their Formula No. 6, but I've already now come to the conclusion that it is the finest record cleaning fluid I've ever experienced. When I use their two-step formula, I will get back with another report.
For the sake of perspective, my standard (or reference) record cleaning fluid for most of the last 30 years has been Nitty Gritty's "Pure 2", which was as good as, or better than, any other fluid I used during that period (and I used everything I could find, including numerous "home brews", mainly from customers). This status changed after I used the Clearaudio cleaning fluid (which came with their RCM). I preferred it to the Pure 2 in both cleaning and with odor issues (inducing headaches). The Formula No. 6 is noticeably superior to all of these fluids, especially if the record has serious "problems".
*I have no plans, for different reasons, to ever use the Audio Intelligent "Archivist" or "Enzymatic" or "Super Cleaner" fluids.
Meanwhile, there is a larger issue concerning the critically important issue of cleaning records I would now like to finally address.
Something Long Overdue...
After decades of experiments with numerous record cleaning machines, using all types of different approaches, personally and in my former store, I've come to the conclusion that the key to cleaning records is not the cleaning machine (assuming it works as designed), but instead the (quality of the) cleaning fluids used with the machine. The more revealing my audio system has become over the years, the more easily this reality is observed. In other words, a budget cleaning machine, which works well, will get better results, with superior fluids, than the most expensive cleaning machines with average fluids.
So, in short: The cleaning fluids are the most important element of cleaning records.
Three records in particular, all of them "ancient music" (which require ultra-quiet surfaces), were able to prove this theory to my satisfaction. All three records had noise problems (one very serious). They were cleaned on a variety of machines and with a variety of fluids. Most importantly, the end results for each LP was dramatically different. Here are the details...
LP One- Begona Olavide-Salterio-MA Recordings-MO25-AV- This record is part of The Supreme Recordings (it's in the "New Listings", so there is no detailed description of it so far). It is very rare. In fact, I've only seen two copies of it. I obviously have one of them (and a close friend, thanks to me, has the other one). However, both of them are quite noisy, despite their "Audiophile 180 gram" vintage and impeccable looking surfaces. Worst of all, the genre of music allows all the noise to be easily heard. I really like the music, and the sound is superb, so I kept it. Besides, how could I sell it to anyone with so much noticeable noise? Of course, I tried to do something about the annoying noise as soon as I purchased it in 2001...
I first tried using Pure 2 (when I was still living in Toronto), but it had no effect whatsoever. My friend also tried the same solution, with the same negative results. Then something like a decade went by (much too fast) and I then tried the Clearaudio fluid, which came with the cleaning machine. This time there was a partial success; the noise was definitely reduced, but it was still quite obvious, and still annoying.
Finally, in 2012, I used the Audio Intelligent Solution 6, and this time it worked as well as one could ever hope for. The grooves were now almost dead silent. The only noise problem remaining was in the first 10 seconds or so (the leading grooves), which is where my cleaning machine has a problem with vacuuming (along with other machines of its general type).
LP Two- Tarentulle-Tarentelle-Harmonia Mundi HM 379 (Speakers Corner)- This record is also part of The Supreme Recordings, though it has been included since its inception, now more than a decade ago. Further, it is only the Speakers Corner Reissue which is being discussed and not the "original pressing". As I wrote, when I reviewed it in 2012, it was noticeably noisy at the beginning of one side, though far less so than the MA Recording discussed above. Still, I felt it was a serious enough problem that it had to be reported, especially considering today's pressing standards.
This time I had only the Pure 2 left to clean the record, since the (small bottle of) Clearaudio fluid had all been used up by then. Unfortunately, the Pure 2 made no difference, and that's where things stood until I was able to clean the LP with the AI Solution No. 6. Once again, lightning struck, and the record's noise problems simply vanished. Finally...
LP Three- La Folia-Harmonia Mundi HM 1050 (Speakers Corner)- This famous recording is another Speakers Corner Reissue (and even in "The Divinity" of The Supreme Recordings), so it is also not to be confused with the original pressing from Harmonia Mundi (or the earlier reissues from ATR). Like the reissue LP above, it was also noisy at the beginning, but this time on both sides. The story is a repeat of the above; the Pure 2 didn't work at all, while the AI Solution No. 6 did work, and just as well as with the first noisy LP above. So, as far as I'm concerned: Case Closed!
Someone whom I trust, and whom is both highly competent and objective, tested a number of record cleaning machines a few years ago, of all different types. He was trying to discover if any of the machines were unable to do the job properly and also if any specific design had a cleaning (vacuuming) superiority over the others. The final results were both surprising and inconclusive. While there were differences, thankfully none of the machines, at any price, failed the test, but the best cleaner, when using a microscope to actually inspect the grooves, surprisingly turned out to be one of the least expensive models, the VPI Model 16.5.
Of course, there were also important differences between them in build quality, reliability, ease of use, speed and "quietness", but the tests still proved that the bottom-line cleaning results were not directly related to price. That is the critical point I'm making at this time.
Further- I would love to post all of the actual results of this important experiment, for better or worse, but I don't have them and the experimenter has also informed me that only this overly-simplified anecdotal report will be released at this time.
My theory about the primacy of cleaning fluids may be "controversial" to some audiophiles, but it is completely consistent with my experiences since 1981, and I felt it must be reported on and posted. Further, I feel my advice to all serious phono-oriented audiophiles, concerning the issue of cleaning records, is also both logical and inescapable, as well as being obvious:
1. Everyone should own, or have access to, a "good" record cleaning machine, which doesn't have to cost a fortune.
2. Only use the finest fluids available, which now means the Audio Intelligent Solutions, or their equivalent(s), if any.
If this simple advice is followed, not only will your records be heard at their best, but their "life" will even be extended*, a critical factor considering their increasingly relative scarcity in our digital age.
*By avoiding unnecessary (and permanent) groove damage, which is inevitable if and when the (otherwise removeable) foreign material is instead grounded into the groove walls by the stylus.
Both of the machines I've used work equally well, if you take the time to use them properly (I have no experience with the latest "Hurricane" model). The unfortunate reality is that the HW-17 is easier to use, so you will use it more often, which makes it worth the extra money. These machines are indispensable for systems with vinyl as the primary source.
Important- I've had serious problems with VPI's Record Cleaning Fluid. Both the concentrated form and the actual solution had some sort of fungus-like material growing/floating in it. It's actually gross to look at. The "fungus" may actually be the plastic container slowly dissolving, but whatever it is, I would think twice before using it on LPs that aren't in really bad condition. (11/03)
Further Information- A reader just sent me some useful information concerning this fluid. Here it is with minimal editing:
"...I noticed the comments you added to your web site last fall regarding the fungus-like material that tends to grow in VPI's record cleaning fluid. About two years ago I noticed this very same thing, and an audiophile friend of mine had the same experience.
In reading the fine print on the VPI bottles, I noticed that the instructions state that the record fluid should be stored in the refrigerator. At that point I started storing my one-gallon jug of fluid in the refrigerator. I still keep a small (8 oz.) dispenser of the fluid unrefrigerated next to my record cleaner at all times. I use this unrefrigerated fluid quickly enough (usually within a month or less) that I have never experienced the mold growth problem again. My friend has also resorted to refrigeration and similarly reports that he has never had a recurrence of the fungus-like growth. I suppose it is a bit of a hassle to store the fluid in the refrigerator, but I have found that it works. "
Personal Note- The VPI fluid I had was purchased around five years ago. The concentrate I received had mold in it the day it arrived. This advice sounds reasonable. However, I would make sure the fluid is CLEARLY LABELED, and that every member of the household, including guests, are informed of its contents. It's poison after all. (3/04)
These machines work just as well as the two VPIs, if not better. They have gravity on their side when vacuuming, and the additional benefit of having no platter to recontaminate the side you cleaned first, but they are not as well built.
These are best for home and casual use only. The VPIs are preferable for heavy-duty and commercial use. It is highly desirable to spend the extra money for their automatic vacuum models, because the cheaper, manual versions are tiresome to use and they also provide little confidence that the entire side of the record was properly vacuumed. Their cleaning fluid, Purifier II, is preferable to the equivalent fluid from VPI.
Considering everything, this Clearaudio RCM model is probably the finest of its type I've ever used. While I would like to be completely unconditional, I can't in this instance, because my memory in this area must analyze more than three decades of countless experiences with numerous machines. I can state that this model does the job quickly, adequately, reliably and without excessive noise. That might not seem like much of a testimonial, but almost every machine has a serious problem in one of those four categories. Still, it must be stated that, like other RCM of its type, the Clearaudio can leave some residue after the drying process, which it a minor annoyance. On the other hand, it removes static better than any other machine I've used, and it even has the capability to remove static without having to first clean the record.
I rarely bring up articles I've seen on other audio websites, but one thread I recently read is so important that I felt I must share it with as many phono-oriented audiophiles as possible. The thread is on the VPI website and it concerns the latest thinking and experiments using "ultrasonics" to clean records. Harry Weisfeld himself began the thread and is its most important contributor. If clean records are a serious priority, this thread must not be missed, even if you are not ready to do something at this time. The link is below:
TopBEHRINGER DCX2496 ULTRADRIVE PRO DIGITAL CROSSOVER (SUBWOOFERS ONLY!)- This is a pretty amazing component, with incredible flexibility, especially considering its very modest cost. Initially, there were some "issues"* I could only sort out after an A/B direct comparison with the DB crossover, which I used for many years.
*I was getting the best overall bass I've ever had with the Behringer, but I didn't know for certain whether it was:
1. My imagination, due to wishful thinking
2. The Dragon amplifiers, which were still breaking in at the time
3. The frequency/phase changes I've made with the Behringer
4. The intrinsic quality of the Behringer
5. Some combination of 2, 3 and 4
And now this A/B comparison has been done. I even had one of my closest associates confirm my observations.
The Results- It turns out there was a slight improvement from the Dragon amplifiers breaking in, but there is no doubt that "No. 4" (the Behringer is better), is the main reason for the improvement that I (and now my associate) have heard. The Behringer is simply cleaner and more detailed* than the DB, and it is even less "noisy", meaning it has a lower "sound-floor". This is an amazing accomplishment for a digital component, at least in our experience. This is a "keeper" for me, especially considering the near unprecedented flexibility augmenting its excellent performance.
However, the reference designation, and my enthusiasm, Is limited to subwoofer applications ONLY.
*Here's one example; The bass drum on the Muti/Firebird on Mobile Fidelity. I can now clearly hear the "wobble" of the skin after the impact, along with its decay, where as before it was mainly obscured by the DB's own "wobble".
The Behringer has an amazing amount of controls and flexibility, but I've used only their most basic parameters;
1. Crossover frequency,
2. Volume level and
3. The degree of phase.
The first two of the three must obviously be part of every crossover, but "the degree of phase" is highly unusual, and totally new to me. It's not just the expected "0" or "180" degrees ("in" and "out" of phase), but every 5 degree point in between those two extremes. I'll discuss my experiences with all three parameters below, but first I must provide a critically important perspective on the use of subwoofers, which took me literally many years of experience to learn.
Subwoofers are used to extend, and/or also improve, the reproduction of the bass frequencies. There is also another possible, and important, added benefit; relieving the main speakers from operating in the bass, thereby improving their midrange performance as well (and even aiding the main amplifier from having to operate in the lower frequencies-another improvement*). When a subwoofer is successfully (and optimally) installed in a system, the listener is actually provided with multiple improvements, and with negligible downsides. That's the ultimate goal, but the actual experience for the vast majority of audiophiles is, unfortunately, almost always much different, so I will now discuss my main rule in choosing and optimizing (a pair** of) subwoofers.
*This is exactly how I have designed and put together my present audio system for the last 6 or 7 years.
** I only recommend using a pair of subwoofers, unless the listening room/budget makes that literally impossible.
My "main rule" is very simple:
If you do, you have a problem, which fortunately can be addressed if the subwoofers are both of high quality and also compatible with the main speakers (two issues which should have been seriously considered before the purchase). The inevitable question then arises: What should you hear with the subwoofers properly installed? This answer is also simple and uncompromising: You should only hear the original (main) speakers now extending into the bass, and with the exact same quality and (lack of) character that was heard prior to the subwoofers' installation. Anything you hear other than that, is a problem to be solved, whether you like what you hear at the time, or not.
The reason for this rule goes to the very heart of creating an audio system in the first place; To hear your favorite music without hearing (audible distractions from) the system and/or the components. So, any component that draws attention to itself, instead of the music, is, by definition, "a problem". Accordingly, for the best chance of long-term satisfaction, the audiophile should choose a subwoofer with both high quality performance, but also the tools (a flexible crossover, and amplifier if needed) to reach its potential performance. Sadly, if I had to choose the one component that is the most easily, and consistently, "heard", that would be the subwoofer. This is the reason why audiophiles must be extra careful when choosing the model, and placing it within the system. It's a serious challenge for even the most experienced listener, with plenty of hurdles, as I will now explain.
There are a variety of ways you can "hear" the subwoofers, but the most common, by far, is playing them too loud. Next is using a crossover frequency which is too low, creating a frequency gap between the two speakers, which causes a "ping-pong" effect between them, as the bass notes go up and down the scale, and from one speaker to the other. A crossover frequency that is too high may also be noticeable. This causes an audible "overlap" between the two speakers, and an unnatural emphasis on the frequency range of the "overlap". Finally, and usually most subtly, the position of the subwoofer may bring attention to itself if it isn't perfectly "in phase" with the main speaker at the crossover frequency. This creates another "ping-pong" situation, though normally not nearly as obvious as an actual gap.
This "minefield" was constantly on my mind as I set up the Behringer crossover. My experiences, which were shared and observed with two of my "associates", are as follows...
I started off with the crossover frequency at 161 Hz, the closest I could get to 160 Hz, the DB's crossover point. The DB has a 36dB/octave slope, while the Behringer provided me with a choice of either a 24 or 48dB/octave slope. I immediately chose the 48dB. I didn't use any other option on the Behringer at that time. The result- After an awful sounding first hour or two from a cold start*, the Behringer started sounding really good, better in fact than what I remembered hearing with the DB for the last 15 years. With no one else around at the time to share this good news with, I soon heard the siren call of the frequency control, and I gave in to it.
*I now keep the Behringer on all the time.
I had originally chosen 160 Hz, around 6 years ago, as the best estimate to avoid a "gap" in my system, even at the risk of a slight overlap. I had previously heard a slight gap when I used another DB crossover at 120 Hz. Well, 160 Hz turned out to be a good choice, since I've never heard a problem with it during this 6 year period. Still, why not experiment, especially when it can be accomplished with a knob, and for free, instead of a trip to the factory. My hope, and goal, was to lower the frequency as much as I could, which would then reduce the contribution of the subwoofer, thus cleaning up the sound by reducing any existing overlap with the main speakers, which are faster. However, as we know, if you lower the frequency too much, you will once again create a "gap", which is more noticeable (and irritating) than an overlap.
Since the Behringer provides changes in 3 Hz increments, I started off with 158 Hz, and when I heard no gap develop, I went down to 155 Hz (etc.), until, slowly but surely over a three week period, I finally ended up at 132 Hz. This surprised me, and I sensed something was wrong, so I stopped, and started experimenting with the volume level instead. I was looking for any method to avoid raising the frequency. This was a mistake on my part, and my volume strategy didn't work. So while I loved the noticeably cleaner sound, I suspected by then that the frequency I chose (132 Hz) was incorrect (I had a gap). However, I didn't want to go back up either, fearing the re-introduction of the subwoofer into the upper bass/lower midrange. What a dilemma, which everyone who uses a subwoofer must eventually confront.
I temporarily avoided the issue by going back to the DB to see what would happen. It didn't take long to hear the results: The DB lacked the quality of the Behringer, but, at the same time, it was just as obvious that I had gone too low. However, I still kept the DB in the system, because one of my "associates" called to say he was coming over for a surprise visit. That evening, we directly compared (A/B) the two crossovers, though only at the higher frequencies (160/1 Hz). He confirmed my preference for the Behringer almost immediately. With the DB now out of the picture, it was time to optimize the Behringer, once and for all. Fortunately for me, as this first associate left the next morning, another associate arrived for his annual 3 day visit that same afternoon. Our first task and experiment; optimizing the Behringer in frequency, volume and degree of phase. It took us the entire evening to accomplish all of this, but it was well worth it.
This 2nd associate first acclimated himself with the system. This was necessary because of an entire year's worth of changes (the UNIverse, Dragon, Behringer) since his last visit. Then we focused only on the crossover frequency, and nothing else. After a few unproductive choices, we ended up using only one record for this task, which is highly revealing of any problems in this entire frequency range (40 Hz to 160 Hz):
LES TRADITIONS RITUELLES DES BONPOS TIBETAINS-OCORA 558622
This record has a small group of male bass voices, with a large bass drum. The frequency of the drum was too low to be relevant, but the voices were right in the middle of our critical frequency range. We started off by lowering the frequency to 151 Hz, and didn't hear any problems, so we went down another 10 Hz to 141 Hz. It took less than 30 seconds to notice that the previously full-bodied men now sounded like the emaciated victims of a concentration camp. So we went back to 151 Hz, for verification, and then tried 148 Hz. Once again, the bodies unnaturally thinned out, though to a lesser degree. Finally, my associate suggested trying 154 Hz, to make certain that 151 Hz wasn't itself too low. So we did, but 154 Hz only thickened the sound, and with no off-setting musical benefit. Thus, 151 Hz became the final, designated, crossover point. (If this process sounds something like adjusting the VTA, or VTF, I concur.)
Now it was on to the volume level, where we used a number of records, with both voices and instruments, soft and loud, but the most revealing LP was:
Stravinsky's Ebony Concerto - DGG 2531 378
This record has a good number of well recorded instruments in this particular frequency range; bassoon, tuba, trombone, piano, cello, double bass etc. We made a series of small adjustments so that no instrument drew "unnatural attention to itself", which is the ultimate goal for both accuracy, and long-term listening satisfaction. Then it was on to the "degree of phase", but this time a calculator was used instead of the normal listening experiments, because this is the one parameter that can, and must, be measured "in inches and feet".
Our ultimate goal was to have the subwoofers share the satellites exact phase at the crossover frequency, 151 Hz, just as if both of them were the exact same distance from the listener. Since the subwoofers were behind the satellites, which is normal for most systems, an adjustment had to be made, and that's where the distance, crossover frequency and the speed of sound (1,130 feet per second/70F) become critical.
We first divide the speed of sound by the frequency of 151 Hz, and get a wavelength of 7.48 feet, or 89.76 inches. Accordingly, if we position the subwoofer exactly 89.76 inches behind the satellite, and play them both "in phase", this would mean that the signal would also be "in phase" at both the satellite's and the listener's position. This, of course, is rarely practical, unless the room is huge. So, what if you only have a few feet to play with, like most people?
Well, you can also go 180 degrees "out of phase", which is exactly half that full length; 44.9 inches. So placing the subwoofer at that exact distance behind the satellite, and playing in "out of phase", would mean that the signal would also be back "in phase" with the satellite once it reached the satellite's (and the listener's) position. That sounds easy, but what if you can't place the subs in that exact position, then what? Well, in the past, you optimized the position for the smallest compromise, and you lived with it, as I did for many years. However, the Behringer crossover removes that final compromise, by allowing you to change the degree of phase, electrically, in tiny 5 degree increments, and not just the former, gross, "black and white", 0 or 180 degrees.
So, if in this instance, the subwoofer had to be positioned 4 feet behind (48 inches) the satellite, that would make it 3.1 inches (48-44.9) further behind the optimum position. By dividing 44.9" by 180 degrees, you will find that each degree is the equivalent of .25". Accordingly, each 5 degree increment must then be the equivalent of 1.25 inches. So, by changing the phase +10 degrees*, or in effect 2.5 inches (2 increments of 1.25"), you are also electrically matching the subwooofer's position to within .6" (3.1 - 2.5 inches) of the optimum. Being able to "move" a speaker, electrically with a knob, to within +/- .6 inch of its optimum position, is something to celebrate, and it has (mainly) subtle audible benefits with certain recordings (along with the "peace of mind" of knowing that this can no longer be the source of a problem).
*The exact setting of this particular example would be "Inverse" (180), plus 10 degrees, or 190 degrees. If the subwoofer was (instead) closer to the satellite than half the distance of a full wavelength, than the correct setting would be less than 180 degress. In that instance, the Behringer would be first set to "Normal" (0), which goes from 0 up to 180 degrees, and then precisely adjusted.
The work is over now, and I'm receiving the benefits of both a superior component (everything in common being equal), and a flexibility that finally provides a set-up which is fully optimized. The Behringer is that ultra rare component which offers excellent sonics (at least in the bass frequencies), good build quality, astonishing flexibility and a budget selling price. It can be the source of headaches if you attempt to optimize more than one parameter at a time (like I foolishly did), but that's the user's own fault, and this (avoidable) risk in no way compromises the value of this component, which I paid full retail price for, or the joy of owning it.
MARCHAND (TUBE) ELECTRONIC CROSSOVERS- I realize that crossovers are not "accessories" by definition, but I have no other category to put them in at this time. It is only their tube models that are References. These are one of the two finest crossovers that I am currently aware of, but the other, the Behringer above, is much more flexible.
I only recommend using them for the "low-pass" (subwoofer) part of the system. They, and every other electronic crossover I am aware of, still have too many sonic downsides to use for the "high-pass" (amps and satellites), unless there is no alternative. The satellites should be amplified "full-range" instead, so that the crossover and the extra cable will both be out of the signal path.
WALKER AUDIO (SST) CONTACT ENHANCER- This is, by far, the finest "contact enhancer" I have ever used. In fact, I consider its usage an indispensable requirement for every high quality audio system. Below is my reasoning;
All contact enhancers attempt to duplicate "the perfect connection", which is a direct connection; in other words, a connection with no connectors at all. To accomplish this, the cable is soldered directly from the source component to the destination component. This is the ideal, but it is extremely impractical to implement and live with, and, accordingly, extremely few audiophiles have actually experienced it. Fortunately, I am one of those few who have.
During the period of approximately 1994-7, my system was (intermittently) almost entirely hardwired; tonearm wire to MC transformer; MC transformer to the preamplifier; preamp to the power amplifiers; and power amps to the speaker drivers. I even bypassed the speaker crossovers by using filters at the amplifier inputs. I did this over a period of time, stage by stage, hearing an improvement in each instance. It eventually came to an end after I heard the Purist Audio interconnects and I found a speaker, the Ars Acoustica System Max, that could outperform the modified WATTS I had been using, even with a standard connection and crossover.
I want to be more specific when describing my personal experiences with direct connections. First, there was only a relatively short period of time during that period when the entire system was hardwired at the same time, mainly due to the difficulty of hardwiring interconnects. Still, I was able to hear that particular change long enough to properly evaluate it. On the other hand, the tonearm wire was still hardwired to the MC transformer to almost the day I left Toronto, a 7 year period of time. What did I hear after all this work?
The system sounded more transparent and also more "direct", or immediate, as should be expected. It was also faster and more precise, plus it was a little more dynamic. Finally, the sound-floor dropped a little. To be frank though, while the improvements were noticeable and much appreciated at the time, I was still disappointed. Why? I was expecting even more, especially considering the extreme lengths I had gone through, the inherent inconvenience and the enormous labor involved. To be even more frank, besides my basic curiosity, the main reason I conducted this "experiment" was because it was the only method I had at the time to get what I hoped would be a major sonic improvement without the expenditure of serious money. So when I finally went back to using standard connections, which I still use today, it wasn't, thankfully, a giant letdown for me. (My new and superior speakers and cables obviously helped during this transition.) Plus, I still retained an important benefit that matters even today...
Due to these various experiences, I've heard the adverse effects of using typical connections twice; by first hearing their absence, and then hearing their re-implementation, in both instances, step-by-step. These experiences have provided me with a unique perspective when auditioning different contact enchancers over the years, and now the Walker SST.
I can't remember every contact enhancer I've used in my life, but there's been plenty of them. The first I can remember was a fluid from Mike Wright, of Dayton-Wright Electrostatic and preamplifier fame. His fluid was applied with a hypodermic needle, so it was actually illegal to use in parts of the United States. A couple of better known agents were "Tweak" and "Kontak". I also used a number of commercial/industrial contact cleaners/enhancers, especially from the computer world. None of these made a real impression on me, though some did appear to work.
The best I've heard, until the Walker SST, was the CAIG Pro Gold Wipes, which retail for around $ 20. I haven't heard the other Pro Gold contact enhancers. In retrospect, I should have placed the Pro Gold Wipes in the Reference Accessories years ago. My mistake. This will be rectified this month.
However, I don't want to give the impression that the wipes are competitive in sonics with the SST, because they aren't. The wipes do work, and are much easier and safer to use. What I heard, along with my associates, was a small improvement, that appeared to bring the performance of the cable back to (at least) where it was when it was initially installed and broken in, plus a further improvement, but it was relatively subtle to us. This might not seem like much, but this small improvement was still more noticeable than any other enhancer we've heard over the years. At least with the Pro Golds, we were certain they made a positive difference which virtually anyone could hear for themselves.
My positive results with the Walker SST go far beyond this...
I believe at this time that the Walker SST, if used on all the possible connections within a tube-based phono system, will provide an overall improvement that is similar to, and as noticeable as, if not more so, the direct connections that I lived with a decade or so ago. This might seem an impossible claim on first thought, but the SST has several advantages to my former direct connections which are critical when a listener hears and evaluates the overall improvement.
The main improvements I hear are a combination of greater immediacy (presence), "directness" and transparency, as well as a noticeable lowering of the music's sound-floor. There is even a greater sense of loudness (volume), as well as an increase in dynamic contrasts, at both softer and louder volumes. The music also appears more precise, articulate and intelligible, allowing lyrics and the musicians' "intentions" and "interplay" to be more easily heard and felt. These latter enhancements are critical to music lovers for musical involvement and enjoyment, and the older I get, the more I appreciate them.
The lower sound-floor is highly welcome because it allows more ambience, space and decays to be heard and sensed. It also magnifies the already noticeable increase in dynamic contrasts; since previously obscured, softer passages are now audible, when the music eventually does becomes louder, the resulting "contrast" is even more pronounced. Finally, bass notes have noticeably increased force and weight, even compared to those higher up on the scale, as if a bass tone control was slightly turned up, but I don't understand how this can happen.
Overall, the combination of improvements, and/or "enhancements" is even greater than what I now remember hearing with ALL my direct connections of a decade ago. How is this possible? How can a simple paste, no matter what the quality, equal a direct connection? It can't. The SST makes an even larger overall sonic improvement only because it also enhances the contacts of the two "weakest links" in my system. These links were just too difficult for me then, and now, to even attempt to make a direct connection; namely the cartridge pins and the tube pins within the phono stage.
None of these sonics enhancements are what I would describe as "dramatic", but combined, they become quite obvious, and much more important to music appreciation than you would expect. In the end, there's no way you would ever want to go back to your system "pre-Walker SST". On the other hand, I don't want to "oversell" the SST, so I'm adding some "reservations" and serious "Caveats", which will augment and contrast what has already been written and posted about the SST in formal reviews and on a couple of website discussions; Audio Asylum and Audiogon in particular.
1. I had only a very small increase in "volume" or loudness, maybe .25 of a decibel, not "a few decibels" that I've read other users have experienced. I'm highly sensitive to volume changes, mainly because my entire system is ultra-minimalist in design and execution, with only 5 total active gain stages. I actually require a few more dbs of gain for a number of LPs that were cut too softly. I do hear an increase in loudness, and the musicians appear a litle more forward on the soundstage, but it's more of a "sense" than something that's highly noticeable, like increasing the volume a decibel or two, which would be a dramatic change in my system and experience. Some of the "increase" in volume, that has been previously described, could also have beem caused by the psychoacoustic effect of hearing the greater sense of immediacy and dynamic contrasts when using the SST.
I'm making a specific point about this because, in my currrent situation, any increase in loudness is seriously welcome for me. Thus I was slightly disappointed with this part of the results, despite my true joy for the "free" .25 dB I did receive. In fact, I would pay a hell of a lot more than $ 70 to get a few extra decibles of loudness, and with no sonic degradation, let alone with other sonic improvements coming along for the ride. And I'm not alone. Almost anyone using an 8 watt (or less) SET amplifier knows where I'm coming from.
2. While I am very happy with the results I've experienced with the SST, I don't think the overall sonic improvement is even close to being equivalent to actually changing components. A number of people have made this claim. Maybe this degree of improvement is what they expect, and will accept, when they change components. For the record, I expect a much greater enhancement, meaning a really dramatic improvement in the quality of my system, before I change components, at least at this stage of my audio life. This perspective is also my advice to others, unless the economics are also crucial to them, meaning the cost of the new component is much cheaper, everything else being equal. A relatively large improvement for a "tweak" can not be compared to the much larger improvement one should insist on before changing components.
3. The improvements I heard were in two "Stages". The first stage, directly after application and for the next 5 or so hours, and then the second stage, which occured between around (break-in) hours 20 to 30. The first stage was only a slight improvement over the Caig Pro Gold, though still worth it in time and money, but nothing to get excited about, at least from my perspective. This was what I was about to write when a reader, who has also contributed some of the posts to Audiogon etc., informed me, by e-mail, that further improvements were on their way, mainly because I had used the SST on my cartridge pins and tube pins, in the power amp and, more importantly, my tube phono stage.
I trusted this reader, held off posting my initial detailed observations, and waited. At around 18 hours or so, and up to around 30 hours, I heard a continual improvement (enhancement) in sonics, which are described above. I would say that approximately 60 to 70% of the total improvement came in the Second Stage. Now assuming this reader is also correct as to the cause, since I did the whole system at one time and not in parts, the "second stage" improvement was due, specifically, to the later and longer break-in of the cartridge pins and tube pins of the phono stage.
4. Accordingly, it will be mainly an audiophile that has both an analog source (cartridge pins) along with a tube phono stage (and amp), that will consider the use of the SST absolutely "indispensable", though more about this particular advice in the Summary.
5. Continuing the inescapable implications of Reservation #3, this means that audiophiles with digital based sources, and/or solid-state electronics, will never hear the same degree of improvement that I, and other phono-tube users, have heard. They will be limited to what I term as "Stage One" enhancements, which are only around a third of SST's ultimate potential. So, at least for these people, the improvements may prove to be disappointing, since they won't meet their unrealistic expectations. I still recommend the SST for these audiophiles; the results justify it.
6. There's enough paste in the small SST container to do around 20 systems, if not more. So if the $ 70 bothers you, which is understandable for many, just share the expense with your audiophile friends; the larger the group, the less the expense per person. (One more reason why having audiophile friends is vital, and another is that one of you may turn out to be an "expert" in actually applying the SST.)
7. All of the above observations are with the "original" SST only. I have no experience with the "Extreme" SST, that recently became available.
1. Like a number of other posters, I strongly advise using only a very thin coat of SST. Nothing more is necessary, and, if anything, using more could be highly dangerous, since the excess SST will/must "spread out", with the specific possibility, and great danger, of causing a short circuit. If this happens, it could seriously damage the components or worse (start a fire!).
This warning is especially applicable with tube pins and AC plugs, because of the high voltage involved. If you do "smear" some on by accident, just use the excess SST on the remaining connections until each of them has the required thin coat, and nothing more.
2. I would be extra careful before putting SST on any "small signal" (9-pin) tubes; 12AX7, 6DJ8 etc. If you must, do it LAST, when you have some "experience" with the substance. This is because the tiny pins are so close together, that it's almost impossible to apply the SST on all of the pins without some of it getting in BETWEEN the tube pins, which could cause a catastrophe (think of the voltages involved) if it isn't cleaned/wiped up properly before being placed back in the tube socket.
3. Finally, there may be some long-term problems or, at least, issues with the use of SST. I've had no problems so far in the short-term, and neither has the helpful reader mentioned above, who has used it for many months. However, another reader sent me this "warning", after noting some of my preliminary observations. Here it is, with only minor editing;
"I wanted to send you a note about SST. ...Now I have always used contact cleaners and clean my system's connections about every four months traditionally. I use Caig Pro Gold and Kontack for this. I did notice an immediate improvement when using SST and did pretty much treat my whole system.The improvements enhanced the clarity of the midrange, and highs were noticeably cleaner. Plus there was a subjective increase in the volume of the system.
I began to have problems with RFI in my system about four months after application, so I began to look for the culprit. At one point I removed all SST from the system. I’m not saying that the SST was the cause of the RFI problem I had, only that I removed it in pursuit of the problem. After four months, the removal and cleaning of all ICs and speaker cables and AC plugs netted a strong positive improvement, with a clarity in the highs (removing a haze or grunge on the highs I had been hearing), better midrange acuity, and tighter bass. I can only conclude though that the SST degraded over that four months to sub-par performance. Unfortunately, SST is very hard to remove and dangerous to your system if it is removed wrong, making a short in the system. Caig Pro Gold is the best stuff I have found to remove it. So it’s not really feasible to clean and reapply every couple of months. So, in conclusion, I won’t use SST, and I suggest that you try removing it after four months or so and see if it still nets the benefit you heard when you first used it. I have heard that it endures better on AC connections and fuses than signal connections."
FURTHER- The same "helpful reader" who gave me good and accurate advice on the SST a while ago, sent me this letter commenting on the above reader's reservations with the SST. Here it is;
"I was just reading the recent update in your BLOG quoting an email from another SST user who commented that; 'Unfortunately, SST is very hard to remove and dangerous to your system if it is removed wrong, making a short in the system.'
I just wanted to make sure you were aware, as you experiment, that SST is easily and quickly removed with isopropyl alcohol on a Q-tip, pipe cleaner or bit of cloth.
Also, I keep seeing Internet posts raising concern that SST dries on the connections over time. I asked Lloyd (Walker) about this, and his comment (which matches my experience) was that, yes, the SST does dry and in doing so it (1) seals the contact point to prevent oxidation, (2) does not migrate, and (3) though dry it continues to stay soft.
As you correctly point out, applying less of SST is better than more."
As I've written above, anyone who has a tube-based system, and using a turntable as a source, must use this accessory. Without it, you are not hearing the components at near their optimum level. Further, along with the sonic enhancements, comes the practical benefit, and psychological security, of knowing that your connection problems are done with; meaning if you have a "problem" with the sonics of your system, you know it's not because of poor connections.
This later benefit is also important for all the audiophiles who use digital sources and transistor electronics. The sonic enhancements will not be as noticeable, as described above, with their current systems, but eliminating any source of potential sonic problems should always be a top priority for serious audiophiles, especially if it's easily affordable, as is the case with the Walker SST. Just don't forget to be careful, as I, and everyone else who has posted their experiences with the SST, have previously mentioned.
This is the finest contact enhancer I've yet experienced, and one of my associates even purchased the "premium" version (I've only used the "ordinary" version). However, SST has one serious problem*; it hardens quickly (like cement), making it literally impossible to use after a few weeks. For some reason, I haven't seen this relevant issue discussed (let alone solved), but my associate has informed me of a working (and inexpensive) solution:
You only need a toothpick or equivalent to do the job in a minute or so. Put in one drop at a time until it's all loosened up. If it rehardens, then simply repeat the process.
*I've also been told that SST "deteriorates" over time (oxidation I assume), which means it must be eventually removed and then a fresh amount must be reapplied to the contact. At this time, I can't confirm or deny that this is a real problem.
Important- See Readers Letters for further information.
CAIG PRO GOLD 'WIPES'- These are the best contact enhancers I heard, until the Walker SST. They retail for around $ 20. I haven't heard the other Pro Gold contact enhancers. In retrospect, I should have placed the Pro Gold Wipes in the Reference Accessories years ago. My mistake.
However, I don't want to give the impression that the wipes are competitive in sonics with the SST, because they aren't. The wipes do work, and are much easier and safer to use. What I heard, along with my associates, was a small improvement, that appeared to bring the performance of the cable back to (at least) where it was when it was initially installed and broken in, plus a further improvement, but it was relatively subtle to us. This might not seem like much, but this small improvement was still more noticeable than any other enhancer we've heard over the years. At least with the Pro Golds, we were certain they made a positive difference which virtually anyone could hear for themselves.
I've been using this (still unnamed) gauge for a few weeks, and I feel it is absolutely indispensable for all serious phono enthusiasts. This is because optimizing the tracking force of the finest cartridges can be as important as their VTA (Vertical Tracking Angle), and is not taken seriously enough by many, if not most, audiophiles. Hopefully, the reasonable costs, accuracy and the ease of use of this new generation of digital gauges will end this neglect.
The digital gauge I use presently sells for $ 79 on Audiogon. The model I have is from Sorasound, the ZYX distributor, though I believe the exact same model is also available for $ 89 (which includes shipping) from "Ans", who is located in Singapore, also on Audiogon. (Check there for other sellers also.)
The scale is accurate to .001 grams. It has verified my previous estimates of Vertical Tracking Force (VTF) changes with the Technics Electronic Stylus Gauge. It is highly critical to have such precision, especially when it is repeatable. This allows a greater degree of VTF experimentation, because the "reference force" is known to a certainty and can be returned to if necessary. It also facilitates relevant and practical communications between audiophiles, based on a common and accurate standard.
Of course, the above all presumes that the tonearm is able to make precise and repeatable changes in the VTF. One of my major criticisms of most tonearms is their inability to change the VTF in tiny increments, which can be later repeated. No top performing cartridge can be heard at its best without optimizing the VTF. The typical +/- .1 grams is a ballpark or starting point, and not even close to being optimized in most cases. Fortunately, I don't have that problem myself...
The Forsell tonearm I use, which is a linear air-bearing type, has the typical sliding weight at the back of the tonearm. The relative position of that weight, secured with a screw, determines the tracking force. However, attached to the bottom of this weight is a nut and bolt for ultra-fine adjustments. I discovered, initially with the Technics electronic gauge, and then verified with the Digital Stylus Gauge, that ten complete revolutions of the nut, forward or backward, had an approximately .1 gram change in the VTF. That meant, of course, that one revolution must have a .01 gram effect on the VTF. (A few skeptics, on some audio discussion websites, have arrogantly claimed that it was "impossible" for me to alter the VTF by such tiny repeatable increments. In effect, they were calling me a liar. They could have asked me for a simple explanation, which I provided for at least one questioning reader, but they chose instead to expose their own ignorance.)
Since the nut on the Forsell is six-sided (a hexagon), it is also easy to rotate just one or more of the sides clockwise, or counterclockwise. So rotating 3 of the 6 sides, which is half a revolution, makes a .005 gram change in VTF. The smallest change I ever made was just half a side, or one-twelfth of one complete revolution. That equals .00083 grams, which is less than one-thousandth of a gram. No. I was NOT able to hear that difference, and neither could any of my friends.
What have we heard?...
One side, or one sixhundredth of a gram, .00167, is usually "sensed"* by us, and is only heard on some rare cartridges with certain records. We start hearing repeatable differences, though it is very subtle, at around two sides, or .0033 of a gram. However, this is true only when the tracking force is relatively close to the point where the cartridge begins to mistrack. Once the VTF is further removed from that critical range, by around .05 grams or so, it takes larger VTF changes to notice a difference. My goal is to always get to around .01 grams of "the optimum setting".
My working definition of "optimum" is a VTF heavy enough to eliminate any audible mistracking, or even the slightest hint or sense of it, on any record, but no heavier than that. This occurs only when you observe the cartridge always sounding totally "secure" and "solid", no matter what LP it is tracking. You want the sound to have "weight", but not to feel "heavy" or "slow". You also want the system to appear "light on its feet", but not "thin" or "lightweight". It's a tough balancing act, but the results are worth the effort.
*I still take this "sensing" seriously, so at the very end of a set-up, I will always rotate one side of the nut (.00167 grams) to increase the VTF. I do this to make sure, in my quest for peace of mind, that I've totally removed the possiblity of any mistracking.
Here's a simple, four-step procedure that anyone can use if they have an accurate digital gauge and a tonearm with fine and repeatable VTF adjustability.
Step 1. Start with the VTF at the lowest recommended setting and increase it .1 grams at a time. The sonics will get better each time, but when they inevitably deteriorate, stop. All that's relevant now are the last three .1 gram positions. You are now "in the ballpark".
Step 2. Of the three relevant .1 gram positions from Step One, choose the middle position as the "ballpark", but reduce the ballpark VTF by .05 grams. Then go back up .05 grams per step until the sonics deteriorate, then stop.
Step 3. If there are three positions in Step Two, then the middle one is the new "ballpark". If there are only two positions from Step Two, then it's the lower one. This time go down only .02 grams from the new ballpark and then increase it the same amount until you hear a deterioration. The last position before the deterioration is usually the optimized setting. However...
Step 4. For fine tuning, and also verification, the position which sounded best in Step 3 should be compared with positions .01 grams both above and below it. Even ultra-fine tuning can now be attempted, if you want to become fanatical about it.
Example One-Optimized VTF of 1.93 grams
Step 1. 1.7, 1.8, 1.9, 2.0 (stop) Ballpark is 1.9 grams
Step 2. 1.85, 1.9, 1.95, 2.0 (stop) Ballpark 1.95 grams
Step 3. 1.93, 1.95 (stop) Optimum force is 1.93
Step 4. Make .01 gram changes until optimized setting is verified.
Example Two-Optimized VTF of 2.17 grams
Step 1. 1.9, 2.0, 2.1, 2.2, 2.3 (stop) Ballpark is 2.2 grams
Step 2. 2.15, 2.2 (stop) Ballpark is 2.15 grams
Step 3. 2.13, 2.15, 2.17, 2.19 (stop) Optimum force is 2.17
Step 4. Make .01 gram changes until optimized setting is verified.
Requirements- Make certain that the "test record(s)" you use are flat. The record(s) should have music which is complex and "demanding", and not easy to track. Also, try to keep the volume exactly the same between trials.
Caveat- This procedure, once done, is NOT final. I would suggest rechecking the VTF with every change of Season, because of temperature and humidity changes, along with the extra hours put on the cantilever suspension.
DB IN-PHASE 36DB/OCTAVE ELECTRONIC CROSSOVER- I have considerable experience using this crossover. In fact, I've been using one for around 15 years, and I have also had experience with different frequencies, from 50Hz up to 160Hz. Changing the frequency must be done at the factory, fortunately at a modest price.
This crossover, like the Marchand, is only to be used as a low-pass filter, in other words for the subwoofer or woofer. The high-pass output, normally used for the "satellites", is not suitable for any high resolution system, since it will seriously compromise the sonics in the midrange and high frequencies. A simple, high-quality capacitor is the best choice there. This crossover is particuarly useful with the Tympani IV bass panels.
Tweaks- A reader, who is a fellow fanatic about "sound floors" and reducing RFI, sent me these inexpensive tweeks he claims will noticeably reduce background noise and garbage in your system:
"I use heavy gauge aluminum foil doubled up-inside of sandwich bags in places you don't want electricity conducted, i.e. over binding post areas of speakers and amps, but just plain thick foil taped to bottoms of equipment rack shelves and over unused electric outlets in wall and ac conditioners (cup cake tins are great)"
This letter is from a veteran reader and (highly reliable) contributor. It deals with stylus cleaning, and a most unlikely source for the actual cleaning material. There is no editing (my bold):
"I thought you'd want to hear about a friend's recent experience. He had only 50-60 hours on his ZYX UNIverse, yet the sound was going dull, high frequencies were abating and he was getting mistracking on dynamic passages that the cartridge had tracked cleanly before. He's not very comfortable adjusting his rig, but the small increase in VTF I encouraged him to try did not help. He decided to ship his UNIverse to me for inspection.
His stylus looked grey and cloudy through my loupe. He cleans it after each side with a ZeroDust, plus occasional dips in my recommended Magic Eraser, but this regimen was visibly inadequate. My stylus is crystal clear under magnification, despite having ten times more hours on it.
After scrubbing away at his stylus with a Magic Eraser, I mounted the cartridge on my rig and played some records. No problems of any kind, his UNIverse performed identically to mine. His stylus is still slightly cloudy so more scrubbing is needed, but his cartridge is on the way to a full recovery.
The Magic Eraser is the most effective stylus cleaning method I've tried, but it does need frequent and proper use to be fully effective. The odd dunk now and then will not suffice.
I've written up a document describing the optimal use of the Magic Eraser for complete stylus maintenance. A copy is attached. I hope you find it interesting and useful."
Personal Notes- As stylus cleaning is critical for optimization and ultimate performance, this information should be very useful to all phono enthusiasts, regardless of the cost of their cartridge. I've now been using the Magic Eraser for months myself, and can enthusiastically recommend it.
A copy of the original (MS Word) document, with the reader's unedited cleaning instructions, can be read with this Link:
Potential Warning- A reader sent along this warning, which I agree with:
"After reading the ME article, I think you might want to include a strong recommendation that that the instructions you sent HAVE to be read before someone tries using the Magic Eraser on his/her own. Maybe common sense should rule, but I might have tried using the ME without instructions."
I've been aware of the heated dispute concerning these devices over the last few years. It all boils down to whether or not an ordinary record can first hold a magnetic charge, which can then be reduced, and, if so, whether that reduction can then be heard. According to the proponents theory, the carbon black coloring (the dye pigment used in the vinyl) can hold a magnetic charge, and there are supposedly objective measurements to prove this, along with the reduction.
I'm an "agnostic" at this point, despite the numerous "rave reviews" of the Furutech DeMag ($ 2,150), and even one of my associates positive, though brief, experiences. Here is a letter from a reader, which inspired me to make my own experiment (see below). There's no editing, but my bold:
"In an earlier email I had mentioned the importance I placed on removing EMI and RFI powerline distortions in the signal path. It didn’t occur to me at the time that the media themselves (vinyl records and CD discs) might have issues related to extraneous magnetization. After reading about the reputed effect of demagnetizing discs in the audio press, I got a surface demagnetizer* (8 inch wide plate) from an electrical supply company for about $300*. Needless to say this was a small fraction of the cost of the equivalent audio industry approved devices.
The LP or CD is moved back and forth over the demag device a few times. When I tried it out I was surprised to find that I agreed with the reported benefits of disc demagnetizing. For example on my system the piano sonics of Satie v1 piano works (Ciccolini ASD 2389) and Beethoven complete piano sonatas (Barenboim EMI) exhibit a slightly hard and glassy treble that is a bit disconnected from the rest of the spectrum. After demag, the piano sound was noticeably more balanced. The treble was better integrated with the midrange and bass. In addition, the overtones of the lower notes were much more evident. The demag generally improves harmonic completeness and detail particularly in the midrange. It also improves perceived spatial depth to a slight, but noticeable, extent."
Personal Notes- Even if a surface demagnetizer works, the question then becomes whether it works as well as the (much more expensive) Furutech. As usual, none of the "reviewers", alluded to above, have even attempted to make this critical comparison. In fact, they don't appear to recognize even the existence of surface demagnetizers. Their complete lack of curiosity, and their undying loyalty to virtually anyone in the audio business, is depressingly obvious. However, while I'm not able to add anything to that issue at this time, I do have some potentially good news on another front...
I recently found and purchased a surface demagnetizer, brand new, on *eBay for only $ 29.50, plus $ 13.77 shipping. It was initially advertised as 8.5" by 4.5", but it was only 6.75" by 4.5". Still, it should work just as well, though with a touch greater effort, so I will experiment with it in the near future. Since an A/B/A comparison is impossible (without multiple copies of the exact same LP), I will have to do my best to make sure that "hope" does not blind me from "reality". I also will ask some of my associates to join me when making the comparisons, though their visits are irregular.
Finally, and this is really important, the above reader later informed me that he kept the LP inside the inner sleeve during the entire demagnetizing process. This will help protect the LP from the worst case scenario of dropping it. He also demagnetized both sides of the LP, even though he wasn't certain that this was necessary. (9/09)
I've been using this record clamp since I received the Reference Lenco back in February 2010. While I haven't tried out all the record clamps available today, I believe the Analog Disc is the finest record clamp I have actually used in any of my systems. The price has gone up in the last two years, but I was told it was mainly because of a large increase in the cost of the materials used in manufacturing.
To be concise and direct; the Analog Disc accomplishes the two critical requirements of a well-designed record clamp:
1. It reduces the record "sliding" on the platter, which, in turn, reduces any speed instability.
2. It absorbs harmful vibrations; from the (turntable/tonearm/cartridge) source, as well as airborne, which, in turn, reduces the overall distortion levels.
To optimize its use, the clamp must be twisted downward until there is a "seal" with the record. This will occur with most LPs, but not all of them (unfortunately). You will know if the "seal" occurred when the clamp is removed, because you will hear a soft "pop" when it is broken.
I can now report that there is actually something real concerning the controversial issue of "Audiophile Fuses", at least in the case of the Audio Horizons ("AH") fuse that I (and an associate) have auditoned in my own system. The positive results we experienced were somewhat of a surprise to both of us, so I felt a confirmation was required, along with attempting to discover the theortetical scientific reason(s) for the changes. Here are the details...
My associate and I both heard the same sonic improvements. They were easily noticeable and they were confirmed with an A/B/A comparison. With the AH fuse installed, the sound was cleaner and less homogenized. The sound-floor became even lower and the music had a more solid feel to it. (It was similar to what is heard when the VTF is increased after it was originally set too low.) Because of all this, a greater amount of musical complexity is revealed. The degree of these improvements is similar to a serious cable change, and just as important on a high resolution system and/or familiar music. The Bottom Line- I can't go back to the "standard fuse" after living with these improvements.
I later requested and received a second AH fuse, this time for the JP-80 phono stage, which has both greater gain, and a weaker input signal, than the Coincident line stage. Because of these two factors, I thought the AH fuse should have an even larger positive impact on the JP-80s ultimate performance, but I was wrong. The improvements were definitely noticeable, and similar in type, but around 70% in degree. As for the details, the background "hash" (already ultra-low) was reduced as before, though this time there was also a reduction in thermal noise ("hiss") as well; a quieter background that should even be able to be measured. In the end, I liked what I heard (or didn't hear) and I once again couldn't go back to the standard fuses.
We weighed the AH fuse on an electronic cartridge scale. The results: The AH fuse was 1.1 gram while the "standard" fuse was .7 gram. That is quite a difference. My associate and I spent an evening theorizing about the underlying scientific reason(s) why the AH fuse is superior. We came up with three possiblities; 1. Less resonances, or 2. less RFI/EMI, or 3. greater conductivity. According to Audio Horizons themselves, it is a reduction in "noise" that provides the enhanced performance, which means it's acting as an AC filter of some type. Since the sound-floor was lower in both cases, this is most likely the best explanation.
There is another "mystery" I should report, though this one is subjective (and irrelevant in the long run). The sonic improvements were more noticeable during the SECOND evening I used the AH fuses, with both the Coincident and the Jadis. It's also imporant to note that, again in both instances, I had the respective components warming up for hours before listening to them on the first evening, so that can not be a factor. I have no explanation for this observation, and I wouldn't have even mentioned it except that it happened twice.
Finally, since a fuse, by definition, will always be the weakest link, why not remove it entirely (by soldering together the internal AC wires)? Of course, that would mean that the potential "disasters", which a fuse provides protection from, can now actually happen, but they rarely occur in my experience. However, a direct connection will not provide the noise reduction of the AH fuse.
These fuses are for real. They should make a noticeable improvement on any serious system, especially if acoustical music is being played. They are expensive in relative terms, but they also provide an unusually large improvement relative to their cost. Now I can understand the concern of some audiophiles that these could actually be some specialized, made in Asia, $ 1.00 fuses, which are repackaged with a large markup. However, I decided that the positive end results trump any cynicism (or paranoia), which is my advice for all interested parties at this time. In fact, I put my own money where my mouth is myself.
The Bottom Line- Audiophiles can hope for a similar fuse to become available in the future, at a substantial discount, or purchase the AH fuse now. I decided on "now", because there is no guarantee a similar fuse will ever become available at a cheaper price and, even if it does, you can never get back the time you listened to your system when it wasn't at its best. So, if you can afford it (them), and you plan to keep the related component(s) for a while, I would go for it (them).
Internet Presence- The Audio Horizons website has no mention of the fuses as far as I can tell. They can be purchased on Audiogon.
Addendum- I will eventually request two more fuses for my (mono) amplifiers, and maybe another fuse for my SACD player and will report back at that time (probably Fall 2015).
I have limited experience with this disc, but it has been all very positive. It has worked better than any other burn-in disc I've ever used. To be specific, I've used the IsoTek with both the APL SACD/CD player and also for breaking-in the CuTF capacitors. The sonic improvements are across the board; purity, transparency, separation, frequency range etc. It costs around $ 30. I found one used for a little less on eBay. The IsoTek disc even includes a short (5 minute) "Rejuvenation" track to keep your system at "100%".
According to the IsoTek designers, the sonic improvements involve "demagnetisation", but I don't have the required technical background to understand, let alone confirm or be critical of, their theories. I can only report that the IsoTek has worked well for me and is now a valued accessory which I use on a regular basis.
An Economical and (yet still) Indispensible Accessory...
A sound pressure meter (SPM) is an extremely important audiophile accessory and/or tool, which I believe every serious audiophile should own. I now wish that I had purchased a SPM decades ago, especially when I operated my retail store from 1981-2001 (I did borrow more than one SPM from a customer). A SPM provides instant knowledge and information, as well as an ability to communicate, objectively, with other audiophiles, including all those on the Internet whom you will never meet in person.
A SPM can clarify what would otherwise be pure speculation, while providing real and fundamental information when making various comparisons; between components, systems, friends and audio store systems and even the systems of internet friends, manufacturers/retailers and journalists. It's a specific measurement, that is easy to understand and which other audiophiles can utilize and appreciate.
Example: A SPM allows the users to match Sound Pressure Levels (SPL) much more accurately and objectively when visiting friends, audio stores and audio show displays. This ability could be highly relevant, if not a requirement, when making a critical observation and evaluation, for serious audiophiles.
In the past, SPMs were more expensive and not as accurate, which is why I previously avoided them (though I now realize, and admit, that this was a really poor excuse to not own of them at the time). The old reality has changed in our contemporary digital world. My basic BAFX model only costs $ 20 (or even less), while the BAFX top of the line (with more features), which I also have at present, is only $ 55, so there is no longer any excuse for not owning one of them (see BAFX links and picture below).
After playing around with it, the first serious use I made of my SPM was to learn both my normal SPL listening range and, directly related, the actual wattage being utilized by my main power amplifiers (Coincident Frankenstein). During normal play, when I wasn't trying to "blow myself, or someone else, away", the volume range was almost always (98%) between 55 to 85 dB (at my ears), and the 2% outliers were usually, though not always, below 55 dB. These numbers surprised me, since I thought they would be higher. Next came the Frankenstein power output calculations, but first I had to calculate the system's sensitivity, and then make precise measurements which took into account the distance from the speakers to my actual listening position (my ears). This process was easier than I expected.
My System's Sensitivity- Starting from scratch, one channel of my speakers, the Coincident Pure Reference Extreme, is specified by the manufacturer as being 94 dB 1 watt/1 meter, which is above average. I then verified this specification with the speaker driver manufacturer, Accuton (and an authorized Accuton distributor for good measure), both of whom even utilized graphs as their ultimate proof. From there, the final calculations were straightforward:
1. Pure Reference Extreme (PRE), One Channel = 94 dB 1 watt/1 meter (Verified);
2. Stereo (Two Channels) PRE = 97 dB;
3. PRE Stereo Doubled Stacked = 100 dB;
4. Finally, the signal measured at 1 meter, by the SPM, is reduced by (almost exactly) 6 dB at my ears/listening position;
5. Ergo, this means that at my listening position, a measurement of 94 dB (100 - 6) = 1 watt of average power is being used by each Frankenstein amplifier.
Interpretation: At my normal listening range of 55 to 85 dB, I am using approximately 1/10,000 to 1/10 of 1 watt, 98% of the time. Consider then the complete lack of relevancy for all those touted measurements of 10 to 100 (or higher) watts for myself, or anyone else with a system even remotely close to mine in sensitivity. (And, it must not be forgotten, I also have a relatively large room.)
The Doors - "When the Music's Over" - Digital Remastered 2 LP Album - 88.8 dB peak
Miles Davis - Kind of Blue - "Freddie Freeloader" - Classic Records Reissue LP - 89.5 dB peak
Mussorgsky/Ravel - Pictures at an Exhibition - "Great Gate of Kiev" - Mobile Fidelity LP - 88.3 dB peak
Stravinsky - The Rite of Spring - "Adoration of the Earth" - Mobile Fidelity LP - 94.4 dB peak (the highest SPL I've measured so far)
It is now a priority to add peak SPL measurements to any article when I feel this information would be helpful. However, to make these measurements truly relevant, we will eventually require a "base line" (or a universally accepted steady signal) to use as an ultimate "Reference Point" (RP), for both records and digital sources. This is an absolute requirement if the goal is to have the most relevant measurements and communication. This RP concept must be thoroughly understood, so I will describe it in greater detail...
Readers must know the exact starting RP (for instance 70 dB) before they can fully utilize and appreciate the peak value measurement (xx dB) of any particular LP/CD. Using this RP method, a reader has the ability to duplicate the exact starting volume level by using the related RP. This then allows him to directly compare his peak dB measurements with those of a specific LP (or CD) measured elsewhere. Accordingly, I plan to find these "SPL Reference Points" (hopefully a variety of test records and CDs) in the next year. The ultimate goal is to make some RPs as "Universal" as possible.
Specific RP Example: I provide an RP of 70 dB with a specific cut on a particular test record. I then listen to "Kind of Blue" at this same RP 70 volume level and subsequently post the peak SPL results. The reader can then match this exact RP of 70 dB with the same exact test record, with their own system, using their volume control. The reader can now play "Kind of Blue" at the exact same volume level (RP 70) as I did when I made the posted measurements. This makes the peak dB levels that I measured comparable and relevant to the measurements he later makes with his own system. Further, any other sonic description of the LP I make will also have greater relevancy, since any volume level discrepancy between us has been eliminated.
Important SPM "Bonus" Function- An SPM can also be used when making a frequency sweep of an audio system. This is done to discover the actual frequency response of that particular system in that particular room. A high quality reference test CD or LP is required first of course, but the SPM will then provide objective data while the frequencies, and related volumes, are changing. This is in sharp contrast to just an educated guess or "gut feeling" as to the true magnitude of those volume changes. For many audiophiles, this knowledge will be as, or even more, important as knowing the sound pressure levels during playback.
SPL measurements will now become routine on this website. It would be a highly welcome development if other audiophiles, especially audio reviewers and journalists, would also disclose their listening volume levels, with specifics as well. I especially hope that the audiophile community can eventually find and agree on some Universal "Reference Points" (CD and LP). As explained above, using a Universal RP is the one certain method to insure that any disclosed SPL data can be effectively "translated", and thus become understandable and relevant to all serious audiophiles, anywhere in the world.
Relevant Links:
BAFX deluxe model bafx3608 $ 55.00
Right: BAFX Deluxe Model 3608, with Case and Accessories
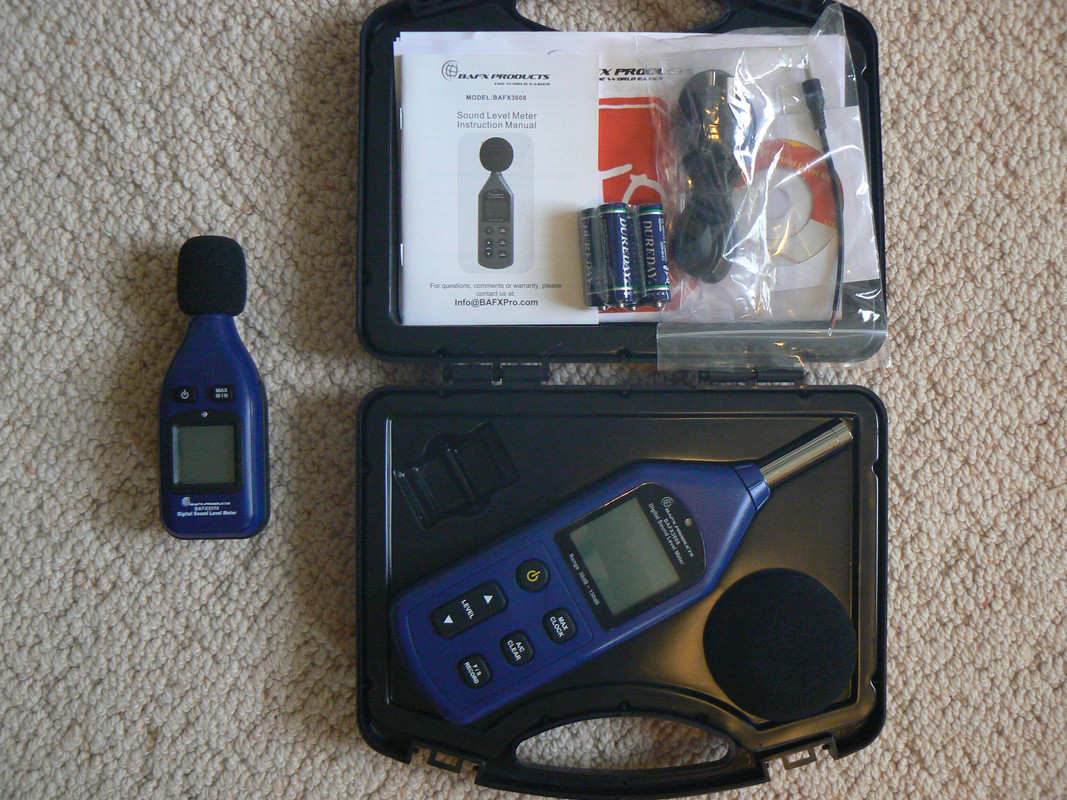
MINUS-K BM-8 ISOLATION SYSTEM- A reader, who is a Biophysicist, sent me some information about this isolation system, which I had never heard of before. It appears to be more advanced than the Vibraplane, and with the added advantage of having no maintenance. It's even less expensive, but it's still not "cheap" by any means. The (factory direct) price is between $ 2,400 and $ 2,500, depending on the load capacity (25, 50 or 100 lbs). Here the letter (with my bold):
"I would like to draw your and your readers' attention to an upgrade that, although not inexpensive, offers substatntial and quantifiable 'bang for the buck'. I've owned a Minus-k Technologies BM-8 vibration-isolation system for several months now. This has been one of the best $ 2.5K I've ever spent on this hobby. I have extensive professional experience with vibration isolation of laser instrumentation and atomic-force microscopes in laboratory environments, which is how I learned about Minus-k. After grappling with serious vibration-isolation problems at home, I finally decided to make the investment in a scientific-grade solution. The improvement to my analog system was nothing short of spectacular. Moreover, this solution, unlike pneumatic isolation, is 'set and forget', requiring absolutely no maintenance. For the record, my LP system, though not state-of-the-art, is pretty good: upgraded VPI TNT Mk.1 (Mk.3 bearing/Mk.1 platter/new integrated motor-flywheel assy.), Graham 1.5t/c, Denon 103 cartridge, EAR 324 phono stage.
(Below is a testimonial that I wrote for Minus-k to post on their web site. I have no financial or other relationship with Minus-k; I'm simply a satisfied customer.
"A Minus-k vibration isolation system should be considered mandatory by anyone who is serious about vinyl playback. With its 0.5-Hz natural frequency, the isolation performance of the BM-8 system is vastly superior to most of the 'audiophile' products on the market. This upgrade to my analog source has allowed me to hear everything that is on the LP by thoroughly isolating the playback system from ambient vibrations. We have done the 'jump-up-and-down' test many times: even heavy falling objects near the turntable have absolutely no audible effect. I live in an 80-year-old house built on a pier-and-beam foundation, about the furthest thing from a well-damped oscillator. My listening room therefore would be an extreme challenge for any vibration-isolation system.")
It is difficult to overstate the benefits of this level of isolation to analog music reproduction. Images are palpable and more stable, there’s an enormous reduction in the 'noise floor', and it’s now possible to appreciate the full scale and dynamic range of an LP recording. The folks at Minus-k are extremely accessible and go out of their way to make certain that their products work in your particular application. In my case, I needed a modification so I could independently level the isolator. They custom-engineered a solution for me and shipped it within days.
I first became aware of their products as an atomic-force microscope user, but decided to ignore the usual 'do not try this at home' caution. I am extremely glad that I did and am considering another Minus-k system – this time for laboratory use."
Further- Here is a link to their website, and the BM-8 directly. It will also go into the permanent Links File.
Personal Notes- I have a lot on my plate right now, but I would like to get one of these sometime next year, finances permitting. It will also be interesting to see if the "mainstream" press (Stereophile) makes the decision to cover this accessory, especially considering their long-term, cozy relationship with the re-seller of the Vibraplane.
Meanwhile, the same reader later sent me a second letter, which directly discusses the Vibraplane compared to the MinusK. Here it is (my bold):
"I am familiar with the Vibraplane, which I believe is identical to one of the workstation isolators made by a company called Kinetic Systems (they make a wide range of isolation products for the scientific and industrial sectors). Although it is also a good product, it falls short in any objective comparison of its performance with the BM-8 (convenience issues aside).
The Vibraplane, like most air tables, has a natural frequency of about 2.5 Hz. Straightforward calculations show that the BM-8 (f0 = 0.5 Hz) has between 1 and 10 percent the transmissibility of the Vibraplane over the range 2.5 to 20 Hz (these data are shown on Minus-k's web site). The only limitation I can see with the BM-8 is its finite load-bearing capacity. Apparently, some parts substitutions can increase the maximum payload to around 150 lb, but with loss of adjustability due to a narrow range of suspension travel. Basically, the unit's low profile is the limitation here. Minus-k makes other isolators that can take larger payloads, but the units are taller and bulkier than the BM-8.
As you well know, this succession of high-technology products is as it should be - something innovative comes along and dramatically lowers the price/performance ratio. How the Vibraplane folks (not necessarily Kinetic, though I haven't looked at their product line lately) can continue to charge what they do for obsolete technology, I don't know . . . ." (9/06)
Personal Notes- Actually, I do know. They are a "protected component", apparently along with everything else that distributor markets, or ever marketed in the past (see The Crown Jewel/Michael Fremer Fiasco). To be fair, virtually every other "established" manufacturer and/or distributor receives the same "protection".
The various Vibraplanes are actually manufactured by Kinetic Systems. They were originally designed for electron microscopes. The re-seller simply attaches a "Vibraplane" sticker on them, and then substantially marks them up. If there are any other differences, I, along with everyone else I've talked with, am unaware of them.
Meanwhile, here is a further letter from the same reader concerning a new isolation stand, though it may not be suitable for audio applications:
"Interestingly, Kinetic Systems has entered into a partnership with Minus-k to market a new workstation product with f0 = 0.5 Hz, the MK26. This product would be overkill for any audio application, but I'm considering it for a couple of lab instruments."
A reader sent me this letter with some interesting, and potentially useful, observations. There's minor editing, but my bold:
"I just wanted to note for what it's worth that I have found the PS Audio Ultimate Outlets to be the most generally useful AC "purifiers", probably because they are completely passive devices (good quality baluns), and don't limit current. I have tried them with different kinds of audio systems (SS, tube, sensitive/insensitive speakers, computer audio), and also with recording equipment. (I used a systematic method to judge the effect.) Their effect has been consistent across all applications, plus they are noiseless. Basically there is the usual reduction of perceived distortion particularly with transients and improved spatial cues. They exhibit much less sonic and practical downside in my experience than the active PS Audio units, as well as the other products like Lightspeed, Shunyata etc. They can be used as easily with power amps as preamps. Interestingly, they can be chained together serially with cumulative effect. With digital gear, I have found benefits with up to 5 units in the power line chain! Six in line was the first point where the "digital signal" began to degrade objectionably in the systems I tried them in. Tube gear usually is optimal with no more than 2 units in line. The only exception is with turntables. As you note, they tend to benefit most from the active generators such as the VPI SDS. PS Audio has revised the Ultimate Outlets, which I have yet to hear, so my comments only apply at this time to the original model.
One other point in the same vein: I have found regular pink noise to be not only the best component break-in signal, but also the best audio path "cleansing" signal. I have tried a number of different commercial "break-in products of varying expense, and none were even as good as conventional pink noise (available on Stereophile Test CDs). I have found that running the pink noise continuously through the signal path, for several hours, results in significant reductions in overall distortion in every system I've tried it in, including recording equipment. I now play pink noise for 2 hours minimum before a serious listening session. The volume level is not important, so the loudness level can be minimal. Solid state and computer audio need 12-18 hours of pink noise to optimize the response, while tube gear only requires 2-4 hours.
What is important, is that the pink noise travel the exact signal path to be used (which makes sense). For example, if you want to listen through the headphone jack of a CD player, than the headphones must be plugged in and the pink noise routed through them. Speakers benefit in the same way as amplifier components do. With respect to the phono stage, Granite Audio has issued a CD with a couple of tracks of pink noise recorded in RIAA equalization suitable to run through a phono stage. I have tried it with the same result as the conventional pink noise CDs on other components."
The same reader later sent the following addendum to the original letter:
"I've found very few "tweaks" that have a uniform effect across systems, which is why I sent them in. I've come to the belief that powerlines (and the related effect of extraneous magnetic fields in the signal path) are one of the biggest contributors to degraded audio performance - digital components in particular should never be connected to AC. They should all run on batteries."
Personal Notes- If we assume that the pink noise will activate every frequency, in every component of the system, then this reader's recommended process is similar to a "workout" which forces every muscle of the body to be utilized. This, in turn, also helps the other muscles. That's the best human analogy I can think of at this time. I've successfully used the Cardas Sweep record for signal-path "cleaning", though it's subtle, but the problem using a LP with pink noise, according to the reader's experience, is that it will require multiple plays, which can be very inconvenient.
This is part of a letter from a veteran reader with a lot of experience with AC power lines. There's only minor editing, and my bold:
"The (PS Audio AC Outlets) are very good filters, being essentially isolation transformers which are the best means of filtering traditional line noise. The problem comes when the electric utility begins to put carrier waves on the 60hz signal that you get in your power. These are 3kHz+ sources that are put on the power line to do many things. In my younger days, they were put on the transmission lines (66kv+) so that when the carrier signal was interrupted, oil circuit breakers would operate to take the line out of service to prevent problems associated with a fault on the transmission grid. Montreal, in 1989, is a good example of what happens when these problems multiply on a grid.
Now these carriers are used on the distribution lines that take power to your house to provide a means of reading the meter remotely, or, more typically, to manage AC loads in the summer. This is a technology that has been introduced since the PS Audios were designed in 2002. There is a base carrier wave that stays on when things are normal, then drops off when the utility needs to turn your AC off to balance load. Another possible use is for the electric utility to get into the Internet business, since a carrier wave, superimposed on the base telephone line, is what makes DSL work, there is no reason that an electric utility can't do it also. Since these waves are part of your electric utility service, they will reflect through the filters such as we have today. That leaves you battling 1st, 2nd and 3rd harmonics of the 3khz carrier wave. The only thing that will completely remove these utility carrier waves is a Rectifier/inverter system that converts AC to DC current, and then electronically rebuilds the AC signal without the carrier wave superimposed over the 60hz source. These usually come in computer grade and laboratory grade power supplies.
http://www.falconups.com/
Yes, they are twice as expensive as the PS Audio, but they do a lot more too."
Personal Note- Since virtually everything that is electronic starts with AC, any degree of impurity of this source may be the most common and frustrating weak link in a system. Any further observations concerning this reader's experiences would be most welcome.
I received this press announcement from Minus K, about a new forum on Vibration Isolation. Here it is:
(Inglewood, CA) To help audiophiles to better understand the influence of vibration noise and how to minimize or eradicate it, Minus K Technology has released the industry’s first online vibration isolation discussion forum. Available through their website at www.minusk.com, the forum gives visitors the opportunity to ask questions and exchange ideas on the frequently misunderstood, but critically important, subject of vibration isolation.
Many audio enthusiasts are not adequately providing for vibration isolation on their audio equipment. Just as high-end audio equipment continues to evolve, so has vibration isolation technology. In addition to the long-standing air isolators, active systems and negative-stiffness isolators have become popular options for those desiring the very best in audio reproduction. But still, most audiophiles are just not quite up to date on their vibration isolation, indicating a general misunderstanding of the subject.
“We developed the forum to help audiophiles become more informed, and make better decisions on vibration isolation solutions for their sound equipment,” says Erik Runge, Director of New Product Development for Minus K Technology. “The forum answers questions and offers assistance where needed. Users can start topics of their choice in interested areas and use the forum as a source and repository for information. Ultimately, audio enthusiasts will be able to make smarter decisions on solving their vibration isolation issues.”
The Minus K online forum covers a variety of audio issues and equipment, and will continue to grow as visitor’s interest expands.
The same reader who sent two letters concerning the B and K Pro-10MC, also sent this letter on a subject I touched on in my "Personal Notes":
"In regard to the Pro-10MC reliability, I did count well over 50 transistors on the circuit board. I ALWAYS from day one kept mine plugged into some kind of power protection circuit. The preamp is always on when plugged in, as the switch on the front only routes signal to the output jacks. It was common to have fast blow fuses blown out in my old Pioneer receiver due to power disturbances in the apartment I lived in while in college. I had a B&K oscilloscope taken out due to a power surge in that apartment building. Solid state devices are the ones usually taken out first. Tube rectifiers and power supply chokes were excellent protection in old tube gear, so the surge protector thing was basically unknown when I was a kid. Our only concern was direct lightning strikes.
A person should look into some of the power conditioners used by biomedical engineering to protect sensitive patient monitoring gear. They were doing the complete power regeneration thing long before PS Audio got into it, and usually at a better cost than the audio related units. They use VERY high quality isolation transformers that meet VERY strict safety and performance criteria. They are generally UPS types that have several batteries inside, so are a yearly maintenence issue, but you can go on listening when the power fails. The sales volume gives better performance for the same cost as audio related power supplies. Every sizeable modern hospital will likely have dozens of these devices installed. They eventually hit the surplus market. I got an extremely good Wang power conditioner from Fair Radio Sales for $180 and it was NOS in a sealed box. It did not have battery UPS, but it did have an electrostatically shielded AIR CORE isolation transformer that was immune from core saturation and it runs very cool and quiet. Would easily cost $1000 if sold new through high-end audio outlets. The transformer and box is worth the $180 if later used in a power amplifier project. So, I ordered a second unit before they sold out. This unit provides zero-crossing solid state tap switching and it goes in rather fine steps. There is no monster hum like the power conditioners commonly used on computers that use a resonant tank circuits to control voltage level. Those large resonant type power conditioner units ARE reasonable to use, and very reliable, if placed near your breaker box in the basement or closet where their hum is contained.
You can feed your audio dedicated outlets from these large units, and can noise filter at the user end using commercial I.E.C. type line power filters. I bought a bunch at surplus for $3, that normally cost $10-$20. They install where your I.E.C. unfiltered power jack normally goes in commercial audio gear. I used one in my tube preamp, and it works. Every old amp a person restores could benefit from one, and as they are thus in parallel with the AC supply, there is little chance of getting resonant interactions that result from series connections. These were VERY common devices in biomedical instrumentation that get installed where old power systems are not below par for modern electronics. GE came in and did a power quality survey in our X-ray rooms, and informed us that if we did not install co-axial type ground wiring dedicated to each room, we would have NO MORE WARRANTY on blown circuit boards. Modern power systems must provide grounding to microwave frequencies in order to protect sensitive modern IC based circuitry. That means the grounding scheme must be a transmission line with near zero impedance from DC to GHz range. The engineer said the cost to GE from bad power/grounding had reached serious levels. Our power grid is reaching third world status in many areas of the country.
I ordered one of those Triplett "power conditioners" sold for $300 to audio enthusiasts at that time and used it in my lab to filter noise from test gear, but it was JUNK compared to that $180 Wang unit I bought for personal use. The Triplett was a cheap autoformer with NO isolation and NO electrostatic shielding with line noise filtering equivalent (or worse) to those $3 I.E.C. line filters I had bought. I know, as I hooked my signal generator up to both of them and made charts to show how well they worked. Dale Technology would sell you a MEDICAL GRADE toroidal isolation transformer (dead silent) in a box with a power switch, circuit breaker, and medical grade outlets and power cord/plug for LESS MONEY that did a better job of filtering noise with no added components than that Triplett junker with phenolic paper circuit board. I bought and tested a Dale Technology unit to isolate monitors in the Emergency Room, and somebody with good taste for good gear saw fit to steal it for their own use.
Dale Technology may still be a good route to go for cost effective power isolation for vintage audio gear. I may get enough time to view their latest offerings, but my Wang conditioner does basically the same thing and adds voltage regulation. With modern C-J gear, these noise filters usually offer little improvement (and can cause problems as C-J has stated), as C-J uses state-of-the-art power transformers and film caps with full regulation in the power supplies. C-J added removable power cords for those with audio nervosa who want to play around. People who get MAJOR sonic improvements with power cords and line conditioners have badly designed gear, PERIOD. The power transformer is your first place to stop noise in properly designed gear, and the good ones cost real money. No gonzo power cord will make up for a trash transformer. I tried three different power transformers in my tube preamp, and there were MASSIVE differences between each one. Best one was 7X the price of the next best one, and worth it. Power surges and lightning strikes are still major concerns, however. That's ALL I currently worry about with my newer C-J gear, and I do not use the Wang conditioner on it as I heard absolutely no sonic improvement. It now protects my computer gear with cheap power supplies.
For safety reasons, more than anything else, power conditioning/protection is a big issue. I pull the power plug when I'm away from home for any length of time. My big tree in the back yard was hit by lightning this summer, and chunks of bark were blown through my dining room window. All my sensitive electronic gear was hooked into power surge protection of some sort. I have never lost any gear due to power surges since that O-scope mishap in 1983. One of my Wang conditioners HAS gone down, after 10 years of service, so maybe it gave up its life to protect my stereo gear. The choke (and its associated tube rectifier) in the power supply was probably the main ingredient for good sound and reliability in classic tube audio gear. When it was removed in most modern designs, that put a much bigger demand on the power transformer and filter caps to stop AC power gremlins. Good luck to the guys with bad power supplies and expensive power cord band aids." (10/07)
Since everything starts with what comes out of the wall socket, and receiving good AC seems to be a growing problem for more people as the years go by, I will continue to post this reader's experiences with UPS devices. There's a little editing to connect two letters into one:
"Clary Corporation (www.clary.com) manufactured a total regeneration UPS I used for biomedical equipment. It is/was not a common name I ever saw advertised in audio gear reviews. These units should be ending up on the surplus market by now at a low price.
In rooms where very sensitive patient diagnostic gear was located, such as EMG's and EEG's, it was recommended to construct a special room where grounded steel mesh was installed behind walls, in ceiling and under the floor if above ground level, and to use special incandescent lamps that were electrically shielded as well. Moving coil cartridges also send out similar small signals in the microvolt range and such steps would help shield from noise if constructing a special audio room.
With the increasing microwave radio signals, grounding needs to be of very low impedance to high frequencies. A piece of wire won't do it as it's an inductor at high frequencies; it has to be a transmission line cable design in a grounded metal sheath with constant low impedance across all frequency ranges. My old 1980s era Hafler FM tuner was shut down by cell phone users in an apartment I once lived in, so we are being swamped by signals in the GHz range, especially in the cities.
I am interested in the total power regenerators since it's so hard to clean up the utility power with filters. Really, the power supplies in something like modern C-J gear is better than filters that most audiophiles buy for noise suppression. In lightning country such as where you live, the only way to listen with any safety is with a battery powered unit that is totally removed from the power grid during lightning activity. That will mean staying away from large tube amps and Krell type solid state amps that suck lots of power, unless you can afford a 5-figure UPS system. The small UPS sine wave regenerators we used cost around $2K and had low leakage electrostaticaly shielded isolation transformers built to medical specs. In several years of service, a unit never went down except for needing regular battery replacement, which was 4 to 6 Panasonic 12V lead acid batteries at about $20 each. You can always go to a large research type hospital and talk to the biomedical repair guys. They have had experience in dealing with very sensitive equipment in electrically noisy environments. They will have stories to tell about losing expensive gear to power disturbances. Hospitals attached to state medical universities are good bets to visit, and you might get some literature to study that they have collected.
An extreme case is to go off the grid and use your own diesel or gas generator. This is not as crazy as it seems in hurricane country as you can lose power for weeks after a storm. Parts of Oklahoma and Arkansas lost power for weeks after an ice storm took down power lines over a large area, and a friend of mine said never again would he be without electrical power in the middle of winter, so he bought his own AC power generator just for such emergencies. Electrical noise and disturbances have become a big issue for a lot of folks besides audiophiles. Where I once lived in east Texas, trees were allowed to grow all around the power lines and that will cause a lot of problems soon as the trees short the lines to ground or falling branches take down the lines.
Further information about Clary...
They manufacture for many different applications including military, scientific and harsh environments. Their products are not cheap, but I considered them good value at the time after looking at a few other manufacturers. Definitely above the Tripp Lite level of quality.
I did a quick web search, and the UPS market has exploded since I last studied the offerings. Lots of Chinese and Asian companies are building these things now, so prices may be low. However, the best parts only come from certain sources and assembly labor doesn't change the final price all that much when dealing with the best quality units. We never had a Clary unit go down, except for teh occasional bad battery.
UPS Units that are total 100% regenerators and NEVER switch from utility power to battery backup are ALWAYS running off their batteries and seem to whack out the batteries much sooner. I had to replace batteries every year in the Clary units, but cheap UPS units I sourced from the computer people for noncritical applications typically could make a battery last 4 years as they ran off utility power and switched to battery backup when voltages dropped to low to regulate the load. In other words, when a Clary unit lost utility power, it simply quit recharging the battery. There is never a switchover and no chance of switchover transients to corrupt data.
I have found it a good idea to stay away from anything related to computers when dealing with audio or medical power supply, unless it was some kind of ultra critical computer application which my agency had no intention of paying for. My $2K Clary units "broke the bank" when compared to cheap computer type units and I had to justify the reason, which is very low noise tightly regulated sine wave operation all the time with no chance of surges getting through unless the unit went up in smoke from a direct lightning hit or some such radical occurrence.
UPS systems go on the surplus market when medical lab equipment is replaced. I threw away a good unit for surplus sale as nobody else wanted to hook it up and buy batteries for it. It powered an old medical lab analyzer that was long gone. The average life expectancy of a lab analyzer was 5 years or less as the technology obsoleted it, not the electronic lifespan. Their UPS units would likely have at least 75% of their lifespan remaining, but for audio use be sure to check the signal to noise ratio. The Clary units had outstanding signal to noise ratios because they had huge experience in critical military and scientific applications rather than just reliable power supply for Joe Consumer. Reliable power is rather cheap, if willing to accept a lot of noise on the output.
Speaking of tubes, a matched pair of 6072 GE tubes just went for $90 on eBay. Another matched pair went for $85. My RCA 6072 versions that I won a bid on went for $19. All prices include shipping. GE most likely built them as well, as the RCA 6072 looks like my GE examples. GE also built many RCA branded 5751 tubes. It was one of their specialties. Funny how the branding causes such price differences with audiophiles. I think my GE 6072A tubes have very extended and linear frequency response. I hear the deep tight bass and extended highs others have reported. I got five NOS 6189 tubes for $15, while somebody else bought ten NOS 5814A tubes for close to $70. The 6189 is the 12AU7 type ruggedized against vibrational and shock damage and suitable for avionics like the 6072 is for 12AX7 applications. The 5814A could go microphonic much easier if subjected to shock. The 5814WA is tested for shock and vibrational resistance. That one little "W" changes the test parameters. Andy Bowman has 6189 tubes listed on his website, and he says the likes of them will probably never be manufactured again. Of course, he gets a lot more than the $3 that I paid for each of mine. If these tubes fare well against my 1959 Mullard ECC82 that goes for $100 to $130 on the internet, then the Mullard just may find itself sold so I can pick up quite a few 6189 types while I can. The military/industrial types were not common in the tube heyday with audiophiles, and did not get a reputaion going early, I guess.
Leo Fender was smart enough to put 5881 tubes in his Bassman amps while others used common 6L6 type tubes. His thinking was reliability more than sound quality, and the 5881 was never made to sound "good" by Tung-Sol, and people loved its distortion in guitar amps. 5881 tubes powered servo control systems in B52 bombers, among other things, and small size, ruggedness, long lifespan and high emission under standby operation was the design criteria. The 5881 sounds fat and breaks up early. Maybe not good for hi fi amps, but it suited a bass amp that would become better known as a high power guitar amp. The 7581 is the 6L6 type loved by bassists and hi fi freaks, and I think it was the tube that Svetlana copied for their 6L6GC which is highly regarded.
NOS output tubes are fairly well used up and thus the factories have concentrated on supplying new versions of them. Looks like in preamp tubes there arebstill good picks in the NOS camp at decent prices. The JJ ECC803S would be my standard when determining what a NOS 12AX7 type was worth. They have crazy high prices there, and thus JJ could hope for high sales of a decent alternative. The NOS 12AT7, 5751, 12AY7 and 12AU7 types are still selling for reasonable prices if you stay away from the hyped versions. The 12AV7 and 5687 types seem virtually undiscovered by audiophiles and could improve on the 12AU7 in certain situations by what I see on the tube data sheets. Triode Electronics is almost giving away NOS 5687 tubes compared to what the audio hyped tubes sell for. If you can support the 400mA heater current, it can make a much better driver than a 12AU7." (10/07)
(WITH THE FUZZMEASURE)
This reader used a very different technique than I did when I optimized my Behringer crossover two years ago (which is no longer in my system). Here it is, with some minor editing and my bold:
"...I use the BEHRINGER DCX2496 ULTRADRIVE PRO DIGITAL CROSSOVER as an equalizer and crossover for my Dipole Woofers. My system is bi-amped with 12" and 10" cone woofers on narrow dipoles, and a dipole ribbon for the mids and highs. Prior to using the Behringer, I used a 1/3 octave analog electronic equalizer combined with a 18 db, discrete transistor electronic crossover on the woofers.
The signal to my mid/high ribbons does not pass through any of these devices. It goes directly to power amps, with the low end roll-off handled by a conventional passive crossover.
To set up the Behringer, I purchased sound measurement software called Fuzzmeasure. There are a number of other sound measurement programs available in different price brackets that can serve the same purpose. I chose the Fuzzmeasure because I found the graphic interface to be well designed. It is very easy to learn and the price seemed reasonable: Less than a good pair of interconnects.
To use the Fuzzmeasure, I placed a measurement microphone (flat from 80hz-8000hz minimum) on a tripod at ear level at my listening chair. The microphone plugs into a mike preamp, which is plugged into the line-in on my Powerbook G4. The Powerbook audio out is connected to my passive preamp and my stereo. At my direction, the software sends an audio sweep through my system and the microphone picks it up. The software processes the information from the microphone, and within a second or two I have a response curve on my screen.
For my initial measurement, I set everything on the Behringer to flat. As I expected, the resulting curve looked horrible (no bass and big hump from 150hz to 1000hz). The software stores each response curve and you can overlay the curves on top of each other. This makes it easy to see the changes as I made measurements of each parameter adjustment.
For my next measurement, I followed the general approach outlined on your website. I adjusted one parameter to a number that I thought might give me good results based on my prior experience. I have been experimenting with speaker design and crossovers since the early seventies and I had thought I knew what slopes and types of curves would give me the best result. I adjusted and measured, adjusted and measured. The resulting curves kept getting flatter and more even, but I had some peaks and dips that were not going away. I ended up trying at least 45-50 different combinations of settings. In my search for perfection, I even tried combinations that I was sure weren't going to work.
When I was finished the response curve was about as flat throughout the low midrange and upper bass as most people ever achieve in a typical listening room (my room is 20'x30'x10' high, with no special acoustic treatment)
Flat response don't automatically mean a speaker system will sound right, so I disconnected the computer and played some vinyl. Wow! It sounded great. My system has never sounded better. The lower bass is reproduced with ease, the soundstage is huge and the mid bass is the best I have ever heard in this room. The transition from the cone woofers to the ribbons isn't perfect, but on most material it's inaudible.
To add to my amazement, the final settings that I use are crossover and equalization slopes that I thought were invalid based on my past reading of crossover design texts and papers. Without the Fuzzmeasure, I would never have had the patience to evaluate all the different possible curves and phase adjustments that the Behringer can provide.
Without the Fuzzmeasure, or its equivalent, I would have missed the full potential of the Behringer."
Personal Notes- I used multiple listeners and recordings to optimize my Behringer. I was very happy with the results, but I am confident that I would have received even better performance if I had used this reader's technique. Even the most experienced listeners can miss something that the microphones will pick up. This reader has a huge and enviable listening room, despite his description of it as "typical".
This reader later sent me a second letter with further information...
"Fuzzmeasure is $150.00. It works with Mac computers. I use a Powerbook G4 (laptop) which is 3.5 years old now. It works flawlessly and fast. You can download a free trial version of the Fuzzmeasure from their website. I tried the free download before I purchased it because I thought it might be complicated to learn, and I wanted to have fun, not get a headache learning software.
At the bare minimum, you also need a microphone that is close to flat through out the range that interests you. Because measurements are made in the listening room, there are many peaks and dips caused by room acoustics. For that reason, I believe it is not necessary to have a extremely accurate calibrated mic. Although if you already have one, use it.
I am using a Panasonic mic capsule, mounted on a brass tube, in a design similar to what Linkwitz describes on his website. I believe the man who designed the Fuzzmeasure has some recommendations for inexpensive measurement microphones that are adequate for the Behringer set up technique that I use. Finally a microphone preamp is necessary. I use a DIY preamp using one IC. It has flat frequency response.
So, for the rank beginner, the cost would be maybe $100 for a manufactured measurement mike, $100 for a manufactured preamp and $150 for the software. Make your own preamp and mic with the Panasonic capsule and it is even cheaper. As we both know, it is very easy to spend this amount on a pair of interconnects." (1/09)
A helpful reader, after seeing my above post this month, sent me further information about the Walker Audio SST. Here it is with only minor editing:
"I saw your recent posting about Walker Audio SST and thought I could share some additional perspective. I've used SST and E-SST (the 'premum version') for over five years and have carefully listened carefully for the impact it has in my system. I fully agree with your comment that SST 'is the finest contact enhancer I've yet experienced'. I also switched to using the Extreme-SST, when it was introduced, after making several listening comparisons to both the original SST and to non-treated contacts. FWIW, I posted my comments on the Extreme-SST on Audiogon at the time: http://forum.audiogon.com/cgi-bin/fr.pl?ymisc&1101694286
Here are some related thoughts:
Drying- Lloyd Walker designed SST to dry after it is applied to a connection in order to 1) prevent any migration to places you might not want it to go and 2) seal the contact area to limit oxidation of the contact surfaces. I have pulled apart tube pin connection that have been in place with SST for over three years and found absolutely no apparent oxidation.
Drying Out in the Container- Walker Audio addresses this on their web site under the heading 'IF PASTE GETS TOO THICK' stating: 'Over time, E-SST and SST will dry to a thick paste. This is by design so that it does not migrate. Use two or three drops of the supplied fluid. Add one drop at a time and stir with a wooden toothpick to achieve a consistency that is easy to work with. You can also use Canola oil available at most grocery stores.'
Current retail packages of SST now include a small vial of the liquid mentioned in the advice above. As an alternative, Lloyd recommend Canola oil over virgin olive oil, but I don't know why.
A further recommendation: KEEP THE CONTAINER WELL SEALED. I use black plastic electricians tape wrapped around the seam of the lid and jar to further minimize any air penetration into the storage jar; I've also put the container in the freezer during long periods of non-use (which I validated with Lloyd Walker as an acceptable approach that would have no downside risk to the efficacy of the SST).
Re-Treatment- The comment about degradation does not match my experience. Over all the time I've used SST, I've never been able to observe this. Because I don't routinely switch out gear, I frequently have connections that have not changed for months and, on a couple occasions, a year or more. When I've had the need to break these connections and then re-do them, I have never been able to tell that there has been an improvement in the sound. If there was deterioration over time, one would expect to hear an improvement upon re-treatment. I've never observed such an improvement -- the great sound is consistent and unchanged. Hope this is helpful." (2/09)
Personal Notes- I am now somewhat behind the curve when it comes to SST, so I would carefully consider this reader's comments. Also, a couple of my associates have also informed me that the "Extreme" version of SST is superior to the original version which I am using.
Finally, I have now successfully used Canola Oil, just a few drops, on my dryed out SST.
Here is an interesting letter from a reader with another perspective on contact enhancers. I don't have any personal experience with the product he mentions, or his general advice about using enhancers, but maybe someone else can add something. There's some editing and my bold:
"Just a quick note... to suggest that Mr. Walker’s 'Contact Enhancer' is also known outside audio-philia as 'conductive grease'. It’s used to secure certain tricky electrical/onic connections (outdoor antennae, for example) & is available with silver content. For example:
Of course 'silver grease' is unbranded, untrendy & non-audiophile approved and, thereby, cheaper than Mr. Walker’s equivalent product! I currently use it, and have used Mr. Walker’s in the past. ...To prolong shelf-life... I would have recommended light machine-oil, the kind used in TTs.
CAVEAT: Metal migration! As you doubtless know, precious metals tend to migrate after prolonged contact. IOW, it may be possible that the contact enhancer’s silver particles will end up inside the gold (silver) coating of our contacts, thereby creating noise. I have not been able to confirm or disconfirm this, so I end up cleaning off the stuff every 2-3 months & reapplying." (6/09)
A reader has proposed a new (for me) method to treat your listening rooms, especially if you are on a budget. Any confirmation would be welcome. I have made some small edits and my bold:
"...if anyone in looking for a cheap alternative for DIY sound absorption panels, Sonopan might be an option. For equivalent performance they are less than half the thickness of rock wool. I glued the panels on Masonite backing, cut them to size, covered them in a suitable cloth and hung them on the wall. The only drawback is that they have a wax smell for a few weeks, but it goes away. This is because they are fabricated from all natural products. They are really cheap, I think I paid about $30 - 40 (Canadian Dollars) for 4 x 8 ft sheets. They don’t do anything for low frequencies, but really what does? They really did have an effect on the imaging of voices and instruments." (8/10)
An Audio Intelligent (Budget) Alternative?...
A reader was apparently inspired by my recently posted articles on record cleaning to send me his latest record cleaning formula. It certainly is different from what I've seen, and used, in the past, and also appears to be more versatile as well. Here it is, with my bold:
"I totally agree with you about the Audio Intelligent cleaning fluids. But… after some experimentation, I have come up with a home-brew formula that is every bit as effective and a small fraction of the cost. The key ingredient is 'Nature's Miracle' - an enzymatic cleaner sold at pet stores to clean up cat boo-boos (ask me how I know about it!). My formula consists of an empty 12-oz squeeze-nozzle-top bottle, into which I pour Aquafina water, 3 capfuls of Nature's Miracle, 2 small ampoules of Boston Enzymatic Contact Lens cleaner (available at Wal-Mart) and 2 small drops of Dawn liquid. Use with a good stiff cleaning brush and vacuum-machine of your choice, and follow if desired with pure Aquafina rinse. Result - dead-quiet surfaces!
Despite the fact that this solution contains some alcohol, it works great on shellac as well as vinyl. Don't believe that you can't clean 78s with alcohol-based formulas - I actually let a large piece of a trashed 78 soak in my cleaner for a week with zero visible effect(!). The enzymes are extremely effective at removing mildew spots, fingerprints and other organic dreck that commonly inhabit shellac surfaces. I have cleaned some extremely rare and valuable 78s with this stuff and have never had a problem. Obviously you don't want the stuff on the record for too long (the soak-test notwithstanding), but I'll let the wet side sit for 20 or 30 seconds to let the enzymes do their thing before vacuuming.
Further tip - I keep the cleaning solution in the fridge. Otherwise it will begin to get funky in a few weeks (cloudy residue and small brown flecks).
Please feel free to share this letter -but I won't take responsibility* if someone feels that my recipe damages their precious discs!" (02/13)
*Personal Notes- Neither will I! Readers are on their own here, especially using alcohol with 78's. If a reader is interested in experimenting with this formula, I advise initially using it on records that have no real value and are easily replaced. Further, if the cleaning fluid is kept in the "fridge", it better be clearly labeled. If any other reader also uses this formula, please let me know the results (good or bad).
A veteran reader sent me his observations about this record cleaner, which I never even heard of until now. There's some minor editing and my bold:
"I have been meaning to send you my impressions on the Spin Clean record cleaner for quite a long time and I am finally found some time to write it up. So far I have cleaned about 1,000 records with the SC, (another 600 or so to go) and I am very pleased with the overall results. The Spin Clean gets records cleaner than anything I have used to date.
The SC is really a batch record cleaning system. If one is looking for a system to clean 1 or 2 records now and then, the SC is not a good alternative. The SC uses a liquid bath with brushes to clean the record. The liquid bath is water with a capful of the SC washer fluid. I use distilled water which I buy by the gallon at the drug store. Once a bath of cleaning liquid is put in the SC basin it is only good for 1 week and then has to be thrown away. Also, the cleaning brushed have to be removed from the unit, rinsed in water and dried between uses.
Typically I will do 15 to 20 or more records at a time. I find that I can clean about 30 to 40 records with a batch of cleaning liquid before it needs to be replaced. After some practice I am able to do about 25 to 30 records per hour. Of course I don't know what's in the SC washer fluid but it appears to have a strong capability of holding dust particles in suspension. After cleaning just 3 or 4 records its easy to see dirt floating in the liquid and fallen to the bottom of the yellow basin. After 30 records the liquid is thick murky grey-brown and the bottom of the basin is covered with a grey coat of dust.
Five drying cloths are provided with the unit, they work very well but get wet quite fast so its hard to do more than 25 records without having to stop to dry the cloths. I put one cloth on a towel under the record, do a first dry on top with another cloth and then a final dry on both sides with a dryer cloth. Once the record is dry its easy to see any finger prints etc. that may be present and do a spot cleaning of them. Cleaned records are put in new plastic inner sleeves that I get at the local record shop.
I should add that I have accumulated a lot of second hand records over the years, I keep only records that appear scratch free. I clean them and if they play OK I keep them if not they get recycled. I cleaned these old records with a home made vacuum cleaning machine. Its basically a box with a vacuum cleaner motor in it and a tt platter on top. I fabricated a cleaning wand from an old vacuum cleaner accessory by cutting a slit in it and gluing felt on each side of the slit. I have used various cleaning products with this machine, the most recent being Nitty Gritty Pure 2. I have never been satisfied that this was doing a good job and the SC has proven it so. When I re-clean my records with the SC, I remove a lot of dirt that the old method wasn't catching. The Nitty Gritty 2 doesn't appear to have any cleaning powers whatever and I really can't see that it does any better than water!
I was really quite surprised and pleased by the first results when playing records cleaned with the SC. No snap crackle pop, no pickup of dust on the needle, no audible artifacts that could be attributed to dirt or film on the record. Records that I had previously cleaned with other methods played much better after the SC cleaning. No record gets on my tt until it has been cleaned in my Spin Clean." (10/13)
A veteran reader sent me two letters concerning DIY cables, both interconnect and speaker. They look interesting, so I though they should be shared. He also sent some pictures, which I have also posted. They included an audio system in Germany that I find fascinating, and would love to hear. Here they are, with some minor editing and my bold:
"About three years ago, I moved together with my family and had to re-arrange my audio equipment to fit the new space. This forced me to take a look at audio interconnects (my old ones were too short now). A new equipment rack had to be made to fit the new location which allowed me to implement vibration control as well.
My main and most important experience I would like to share with you and our community is an experience I made with DIY interconnects that I built myself - more out of necessity, then out of belief. Up to that point, I was using Kimber’s top of the line reference silver interconnects KS-1036 (single ended) and KS-1136 (balanced). During multiple comparisons, in several systems, these cables always managed to come out on top and were able to lift the performance of a well known system to higher - sometimes much higher levels.
Because I was not able and willing to spend much more money for much longer reference interconnects from Kimber (I now needed 8-12 ft interconnects - instead of 3 ft, because the new rack is L-shaped), I started to read and experiment with DIY recipes for interconnects. Long story short - my first self made pure silver cable immediately outperformed my beloved and highly praised Kimber reference cables! I started to experiment and was able to further improve the performance of the DIY cable.
It is not very difficult at all to build these terrific sounding cables - anyone who knows how to (or feels capable to) solder two wires together can do this! The price of the DIY cable is ridiculously low - compared to the Kimber reference - and other high end cables. The balanced Kimber KS-1136 currently lists at $ 3,335 for 1 meter/pair (Needledoctor). Materials for the outperforming DIY version costs around $ 140!!! Plus it takes a bit of time to make the cable.
The Kimber in comparison smears - especially noticeable in upper mids and high frequencies, it sounds colorless, grainy and icy in comparison. The DIY cable has a significantly lower sound floor and higher detail retrieval as well as better focus. It opens up the stage noticeably and deepens it significantly. It is much richer in harmonics and full of colors that are missing with the Kimber - and its liquidity is disarming!
After this (to me) shocking experience, I tried the same thing with speaker cables - with very much the same result. My Kimber 12TC All Clear (the German version of the American 12TC) is a great speaker cable, but it is not able to get close to the performance of the DIY version. The Kimber again smears and lacks resolution - especially noticeable in complex passages. Sound floor of the DIY cable is noticeably lower and opens up a window to sonic information that was previously lost. The soundstage is so much deeper - that together with a deeper sound floor all of my recordings (no matter if vinyl or CD) suddenly sounded like they were recorded in a church - with plenty of echo and reverberation.
Even though some of the cable companies and their retail prices outright disgust me (look at Nordost’s new Odin2 series), my only goal is to educate music lovers - and not harm companies like Nordost or Kimber. I want to share this exciting and easy way to get closer to the music we love.
Please be assured that I have no commercial interest in this whatsoever. My pure enthusiasm is driving me!"
The readers's second letter (with some repetition)...
"Attached are a few pictures showing the RCA and XLR cables I have built... As I mentioned in my earlier email, I’m contacting you to share my experience with our community and readers of your webpage. Cables can have a significant impact on the performance of a system. The higher the overall resolution of a system - the more obvious the differences between two cables will be noticeable to the listener. Without excellent cables an otherwise excellent system will not be able to perform at or near its highest possible level.
What I found in my little DIY cable project is that it does not take much at all to build interconnects and speaker cables of the highest performance level at a fraction of the cost of today’s (oftentimes) disgustingly overpriced 'top tear products'. Nordost just introduced its new reference line “Odin2” - 0.6 meter of their RCA cable has a list price of $ 19,999!!!
For both types (RCA & XLR of my DIY cable) I use 24 Gauge (0.5 mm) pure silver conductors cryo treated and polyesterimide coated to prevent oxidizing of the silver conductor. As dielectric, I use untreated cotton. My RCA cables have three layers of cotton tubing and a protective outer nylon sleeve.
Because I found contradicting information about the optimum number of conductors per pole, I experimented and came to the conclusion that less really is more! One conductor per pole offers best results! This is true for RCA and XLR cables. This result was surprising because Kimber’s top of the line interconnects, KS-1036/1136, use three conductors per pole - while their lower tear products use two or only one conductor per pole.
With balanced interconnects I also experimented with different ground conductors. For their top of the line balanced interconnects Kimber uses a coaxial copper cable with stranded copper center conductor as ground. Compared to one or more silver conductors as ground the coaxial copper conductor offered best results with lower sound floor and a larger and deeper sound stage. So I settled on the coax copper cable as ground conductor for my balanced cables.
Following Tempoelectric’s recommendation for speaker cables, I tried a 1.3 mm bare silver wire. Instead of using a Teflon jacket, I used a 2 mm cotton sleeve as dielectric for the speaker wire. I connected the silver wire to the binding posts of my amp and speakers without termination. The results are amazing!
Compared to Kimber’s 12TC I previously used, the sound floor dropped noticeably. Resolution across the whole frequency spectrum increased dramatically. Complex passages turned from a sludge of information into separately recognizable events. Bass performance with the silver cable is in a class of its own. The Kimber sounds bloated mushy and uncontrolled in comparison. Bass notes on Ray Brown’s LP Super Bass (Capri 74018) had more color and texture then I ever heard before from this familiar record - they sounded more like the real instrument.
There are different sources on the web offering silver wire and cotton tubing. Tempoelecrtic offers a variety of AWG classes - from 30 Gauge (0.25 mm) to 10 Gauge (2.6 mm). I ordered the 1.3 mm silver wire for the speaker cable from Joe at Tempoelectric. As far as I know Tempoelectric does not cryo treat it’s wire and it comes without any protective coating. Tempoelectric does not offer cotton tubing.
vt4c offers a variety of silver wire and cotton tubing as well. They are located in Hong Kong.
RmA Audio is the German Partner of the Swiss Company 'Audio Consulting'. For my DIY interconnects, I used RmA's 24 Gauge cryo treated, polyesterimide coated pure silver wire plus cotton tubing and 10 % silver solder. I visited Raimund Auernhammer (RmA) in July in Southern-Germany...Attached are pictures from his amazing all battery-powered system - custom designed by Audio Consulting.
Algorythme is the U.S. partner of Audio Consulting - they don't seem to offer DIY products.
If interested readers contact you for more specific information please feel free to forward their emails to me." (10/15)
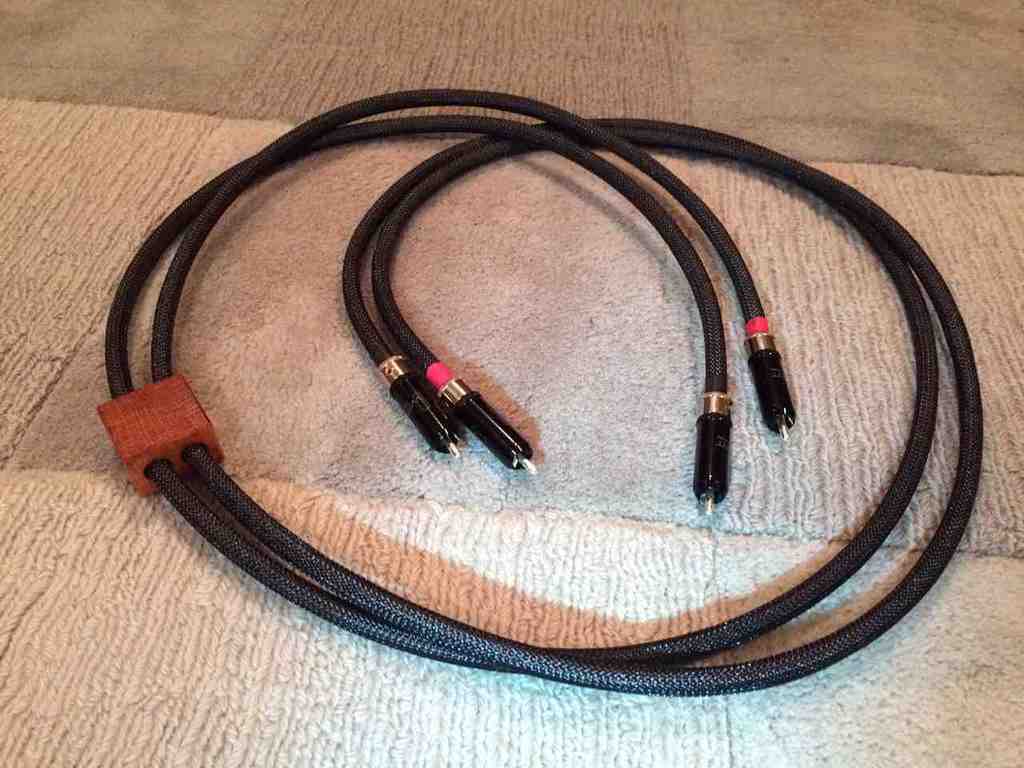
Relevant Link:
Audio Consulting (Speakers and amplification)
A veteran reader sent me some information on some new (to me) isolation devices, which I am always interested in. I felt it should be shared, so below is his letter, with minor editing and my bold and a link as well:
"amcanaudio.com has footers, Lg and small, using a special formulated silicone, enclosed in a hard dense enclosure, which doubles the affect. The technology uses CNF isolation. Well, I took to reading about the technology, and CNF is the final answer to the industrial problem for vibration solutions and seismic damping for buildings.
So in playing around with multi constraint plinths, after about four tries I seemed to get the the right combo that render amazing timber and openness of tone. I was using panzerholtz and four layers of ply/mdf, 3.5 inches of plinth. I always felt my system was truncated in the upper high end. I managed to achieve 90% of what I was looking for... but still I was not satisfied. When I screwed the Amcan footers in, the first thing I noticed was not a quantum leap in Bass, but what seemed to be two octaves of High end.
Well, upon reading more about CNF isolation the surprise result was the dramatic lowering of extreme high end noise. Who knew? Also, I noticed stunning clarity, and tonal harmony. The owner claims they damp to 5 hz and lower. The silicone is quite compressible and with increased load the damping effect will increase in efficiency. They work they are amazing and the are under $100 per footer; High end at reasonable prices. The TT footers come with a leveler. The thread on the leveler is very loosy goosy, (Like the Stillpoints) and they don't cost $800 per. The audio bargoon of the century." (01/21)
Relevant Link:
A veteran reader has generously sent me his observations concerning the Emotiva AC Line Filter, which I felt should be shared. According to the Emotiva website, see link below, this unit has 2 outlets and sells for $ 149. They also have a similar unit with 6 outlets, which sells for $ 199, which the reader has not heard. Here is the letter, with some minor editing...
"I've been experimenting with the Emotiva CMX2 line common mode filter/DC offset in different situations. I might note that I have tried many line filters over the years but only the Emotiva CMX2 as well as the PS Audio Ultimate Outlets seem to do more good than harm. I would note that both devices have common mode filtration. What follows are my tentative conclusions:
Highly Recommended: Plug in digital media player whether DVD or SACD/CD player and CRT TV
I saw and heard only significant improvements without noticeable downside by plugging in my SACD players (currently Sony ES models) and DVD player (currently Marantz). For example in watching the DVD of Tchaikovsky's opera Cherevichki (The Tsarina's Slippers) I was astonished by the details my large late model Samsung CRT TV was displaying. As performed at Glyndebourne (2009), the Russian embroidered costumes for the women have myriad fine details. Before the CMX2, they were a bit blurry on my CRT, which understandably excels more with 3D imaging and accurate blackness (tubes!) than fine visual detail. With both the TV and DVD player plugged into the CMX2, I was seeing astonishing detail for a CRT without losing anything positive from it. The sound remained excellent and undisturbed. Although the amps were plugged separately into an PS Audio Ultimate Outlet, the PS Audio was plugged on the same double wall outlet below the TV/DVD. The audio sonics also sounded more coherent and lively.
Recommended: Plug in TT and Solid State Amps
I heard no drawback from plugging in my VPI TT into the CMX2, but that assumes you don't need a RPM controller to maintain proper speed. SS amps exhibited some modest improvement primarily from tightened bass. In addition, the midrange seemed a bit more lively and immediate. I did not notice any change for the worse in the treble. One other positive is a very noticeable increase in rhythmic accuracy, whether in the bass or treble. For example, I was astounded by the precision and accuracy of the reproduced xylophone playing on the Boulez recording of Varese's orchestral works revealed with the CMX2.
Perhaps: Tube Amps and Preamps
Plugging in tube power amps, headphone amps or preamps tended to clarify the texture but not to an unpleasant level. There was a noticeable tightening of tube bass which no longer seemed sloppy. in addition midrange detail was more noticeable and seemingly accurate. I listened to a performance of Stravinsky's Agon on the web with score through my headphone amp, which is all tube with tube rectification (Cayin HP1A). Agon was chosen because it has a variety of instruments, but within a chamber orchestra so the different instruments can be heard reasonably well. The level of instrumental detail was remarkably better with the CMX2 and the overall sound seemed more coherent. One aspect that may bother some though is that occasionally there was a slight reduction of what I might term instrumental glow or fullness compared to not using the CMX2.
Question Mark: Computers and Monitors
I could not get my computer or monitors to work with the CMX2. The CMX2 consistently went into a line fault condition of Hot Neutral/Reversed Ground when they were plugged in. The CMX2 is designed to accurately indicate Any line faults. When they were removed the CMX2 promptly returned to normal. I don't know if this is universal or a peculiarity of Hewlett Packard, Lenova or Samsung LED monitors and computers.
Strongly Discouraged: Plugging two CMX2s into the same double wall outlet
Plugging in two CMX2s into the same wall outlet produced a noticeable degradation of the sound. The treble sounded harsh and the music flow seemed disjointed."
"I was able to have a direct conversation with an Emotiva engineer and we discussed the issues of the computer and monitor I was having with the CMX2. He said that the issue is the switching power supplies on these devices. They have unpredictable effects with the CMX2. Sometimes nothing unusual happens, sometimes an error light warning appears on the CMX2 indicating Hot Neutral, but the devices keep working and in extremely rare situations the line noise can cause an interruption which turns off the devices (not the CMX2) until they are disconnected from the CMX2 and plugged in elsewhere. He said that the CMX6 does not have those issues because it does not have the DC offset correction of the CMX2.
He recommended the CMX2 for audio devices and said that's where customers were using it. The CMX6 is more of a power strip with common mode filtering added. Hope this clarifies the situation with the CMX2." (03/24)
Relevant Link:
TopIf you have a question, or want audio advice and/or consultation:
Important Notice- As of October 1, 2012, there is a minimum fee of $ 10 for me to answer a simple enquiry, which means any question that I can answer quickly without research. Anything else will cost more and I will accordingly provide quotes for approval. PayPal is being used for its convenience, universality and security. If interested, click on "Ask Arthur".
There are two exemptions to the payment fees. 1. Those readers who have provided an important service (usually information that was posted) to this website over the years. 2. Those situations where I feel that I overlooked something important and/or was obscure in my post, and thus some necessary clarification is required on my part. That will always be gratis. I don't believe in being unfair or petty, especially to my own readers.
Telephone Conversations- If a reader feels it is necessary to actually talk to me directly, this can be arranged if I also feel it is appropriate. There will be a minimum fee of $ 50. Ask for the details before paying the fee.
Finally, a veteran reader wrote that I "should also have a link for (generic) donations to keep the website going". I replied that the Donation button can also be used by appreciative readers for that purpose. Needless to say, any unsolicited donation from a generous reader receives my sincerest thanks and gratitude.
To contact me for any other reason:
COPYRIGHT 2025 ARTHUR SALVATORE