MY ASSOCIATE'S FIRST USC EXPERIENCES
RUSH PAUL "POSITIVE FEEDBACK" ESSAY
Until 2016, neither I nor any of my associates have had any direct experience with Ultra Sonic Record Cleaning (US). In contrast, we have had decades of experience using "traditional" record cleaning machines, which first apply cleaning fluids to the vinyl and then vacuum dry the record, all at once or groove by groove. This has now changed. First my associates, and then I, used the Ultra Sonic method and we can now report the results.
I decided it would be best to make this a three part report for now. In Part One (below), an associate, with the most US experience, will discuss ultra sonic cleaning in general, along with some observations of the actual results. Part Two will be much more detailed. I will first go over my personal record cleaning history. I will then discuss my own sonic results, as well as the specifics of the actual models and machines that were used. I will also provide more US cleaning protocol details, and even include some pictures and relevant links. Meanwhile, Part Three is an article from Rush Paul, who has more experience with ultra sonic cleaning than anyone I know of at this time. Paul's article was originally posted in Positive Feedback. Paul has promised future updates on his article when necessary.
More recently, in 2020, a Part Four became necessary. I purchased and reviewed the DeGritter ultra sonic cleaning machine. This review has now also been posted here.
Editor: Only minor editing and my bold:
"The topic of properly cleaning vinyl has been discussed for decades with a consensus adopted that dictates that all LPs should be subjected to a high quality vacuum machine with a variety of recommended fluids. Many have claimed that washing a record in this manner will not only substantially improve the sonic performance, but will preserve the vinyl and eliminate or substantially reduce noise and static of the vinyl. There are a plethora of such machines in existence at various price points, but all essentially accomplish the same goal, albeit with varying levels of convenience and ease of use.
There is no doubt that a well scrubbed record will sound better and survive longer than a dirty LP littered with human finger oils, dog hair, dust and other sundry contaminants. However, over the years, the overall performance advantages seemed to be overstated and, surprisingly at times, barely evident. What has changed all that? The answer is ultra sonic cleaning of records (or "cavitation"). This method comprises the purchase of an ultra sonic cleaning machine (employed in industry for years to scrupulously clean jewellery, machine and car parts etc) and an adapter kit, where the LPs are mounted and a motor spins them very slowly in the liquid bath. (Editor- I will provide details concerning the specific ultra sonic machine and adapter kit models in Part Two.)
The requirements of the US machine are that its tub capacity be a minimum of 9 liters and that it has an integral power limiter. The former is necessary so that LPs will fit comfortably in the tub for proper cleaning, while the latter permits the reduction of the ultimate power operating parameters to a maximum of 60%. Full power operation will cause permanent damage to the vinyl with the attendant sonic degradation. The complaints coming from some quarters about high end roll off after an ultra sonic cleaning are due to full power output during the cleaning process. Furthermore, the records should not be in the cleaning tub for longer than 15 minutes.
What does this ultra sonic cleaning process actually accomplish that conventional vacuum based machines do not? A revelatory experience, that’s what. To begin, we compared US cleaned records to the VPI 16.5 RCM; two identical recordings, same pressing, same condition (Villancicos - HM 1025*) were the test subjects.
One copy was put through the US process, while the other had been cleaned with the VPI machine using L’Art du Son fluid. The VPI cleaned copy was auditioned first. As usual, the sound was glorious in every way. Villancicos is an exceptional recording with demanding, full range music with stunningly natural, transparent sonics. Hard to find any faults. Then the US cleaned copy was auditioned. After 15 seconds of the first cut, the improvement in sonics was startling. The sound floor was substantially lowered, surface noise was non existent, while previously there was a slight amount of hiss present. The record visually appeared pristine which corresponded to how it sounded. The sense of immediacy, expansion of the soundstage, the revelation of low level detail and more complete harmonics was instantly apparent. Ambient cues created a greater awareness of the size and volume of the recording venue. Dynamic gradations were dramatically expanded.
In short, a transformative experience. One that was completely unexpected in its magnitude. No longer could I listen to any further LPs in my collection without a US cleaning. Within a few days, more than 200 records were cleaned. LP after LP exhibited the same results as that initial Villancicos experience. NOT A SINGLE LP did not exhibit superior sonics with much lower surface noise. Some to a greater degree, others slightly less so. It was as if my record collection was replaced with super 45 RPM versions. The degree of improvement was clearly apparent to every listener who took part in this experiment.
Cleaning your records with a US machine is absolutely necessary if the goal is to hear every last detail of musical information buried in those precious grooves. There is NO downside. This represents a clear cut win- win proposition."
*Editor's Note- Villancicos/HM 1025 is one of only 25 records in the highest category of The Supreme Recordings: THE DIVINITY
Like many "first experiences" in life, I still vividly remember the first record cleaning machine (RCM) I purchased and used. It was back in 1981, just a few months before I opened my audio store in Toronto, that I purchased the Keith Monks (KM) record cleaner. I had seen the KM being demonstrated at audio shows and just had to have one for myself, despite its very high cost, especially for that time. The entire concept of wet/vacuum record cleaning was more than just appealing to me, I felt it was also an audiophile requirement.
The KM worked well, though it did have some "eccentricities". The wet part was fine, with the platter turning very fast (like a 78 RPM turntable, and unlike later VPI/Nitty Gritty models). The drying part was slow though, with a tonearm device sucking in the fluid from only a single groove* as the platter rotated. This method is claimed to have an advantage by the KM's proponents, though it will obviously take much longer than the later approach used by VPI (and many others). Further, the KM tonearm had a string going through it (for various reasons) which also had the potential to cause problems. In the end, I don't believe I sold even one KM machine, though it did earn some income for the store by cleaning customers records for a small fee. Once the VPI RCM became available within the next year, I eventually sold the KM and never looked back.
The original VPI RCM was a popular breakthrough because it finally brought record cleaning machines into the mainstream. It had two important advantages over the KM model: 1. It was much less expensive. 2. It dried the record much quicker (using a tube to vacuum up the liquid over all of the grooves* simultaneously). The VPI was noisier though and also still somewhat expensive, so most of my customers still paid a fee to clean their records. (By this time, the VPI had become so familiar that I had the customers clean their own records.) Eventually, many models became available using this same basic VPI design, and this is still true today. Bottom Line for all phonophiles: Record Cleaning is a Necessity, and this is especially true if purchasing used records is part of an audiophile's life.
*Yes, I realize that there is only one groove on a record in the strict literal sense, but I'm discussing this issue in visual terms.
In the long run, I ended up with a Clearaudio (Double Smart Matrix) that was well built, worked very well and even cleaned both sides at once, saving precious time. Still, based on my decades of experience (along with my associates), I don't believe there is a significant difference between any of these machines in actual cleaning abilities, regardless of cost, even admitting there are separations of noise, build quality, ease of use and one or two-sided cleaning. However, I did discover the one critically important factor when cleaning records with all of these wet/dry machines, regardless of their design and price: the Cleaning Fluids. In short, I strongly believe the record cleaning fluids are more significant to the final results than the actual machines themselves. I ended up using Audio Intelligent cleaning fluids (see link below), though others may do just as well.
This brings us to the present and our experiences with ultra sonic record cleaning, which is a totally different method than the now standard wet/dry cleaning machines. My associate's experiences are already posted above and mine are below. It is also important to note that I deliberately ignored the details of my associate's experiences, so as to avoid any bias.
Critical Perspective- Ultra sonic cleaning (USC) has a very different sonic impact when compared to "standard cleaning" (SC). SC removes foreign material and particles, some even visible, which cause the annoying ticks and pops. In contrast, USC removes invisible, micro-sized, foreign material that SC is not able to remove in our experience, regardless of the machine, fluids and/or number of cleanings attempted. In effect, SC reduces the audible problems which are already audible and known, while USC removes the previously unknown audible problems, which only become actually known if and after they are removed.
It is also important to note that all the records I am basing my reporting on, using USC, were already previously cleaned using a VPI, Nitty Gritty or Clearaudio RCM. In fact, most of these records had been cleaned twice. The Clearaudio was always the second machine because of the improved results I reported on, which were mainly due to using superior cleaning fluids. In short, these "experimental/reference" records were already as clean as I was able to get them using SC. And, finally, this is what I consistently observed...
There were only improvements and no downsides at any time. The sound was more immediate, naked and direct. It is similar in type to what you hear with a direct-to-disc record, or when bypassing a line stage (going "direct") or a signal cable, though not to that same degree. The sound was also cleaner and purer, at all volume levels and frequencies (particularly in the highs). There was less noticeable homogenization, especially during complex and challenging passages. There was a greater natural sense of space, longer decays and better image focus. Transients were faster, cleaner and more precise. The "background surface noise" was reduced, along with the entire sound-floor. Some improvements were subtle, while others more easily noticeable. The most concise description of these improvements I can make is this: The records all sounded more like "The Master Tape".
I have followed only one USC protocol. It is the exact same protocol that my associate used earlier and which Kuzma recommended based on their experiments. Why? This would allow me to definitively confirm or contradict my associate's findings, which has to be my main priority at this time. There will obviously be plenty of time and opportunity to experiment with other protocols in the future (and I will provide links to other interesting USC protocols below). Here is a description of our shared protocol, with any minor differences noted:
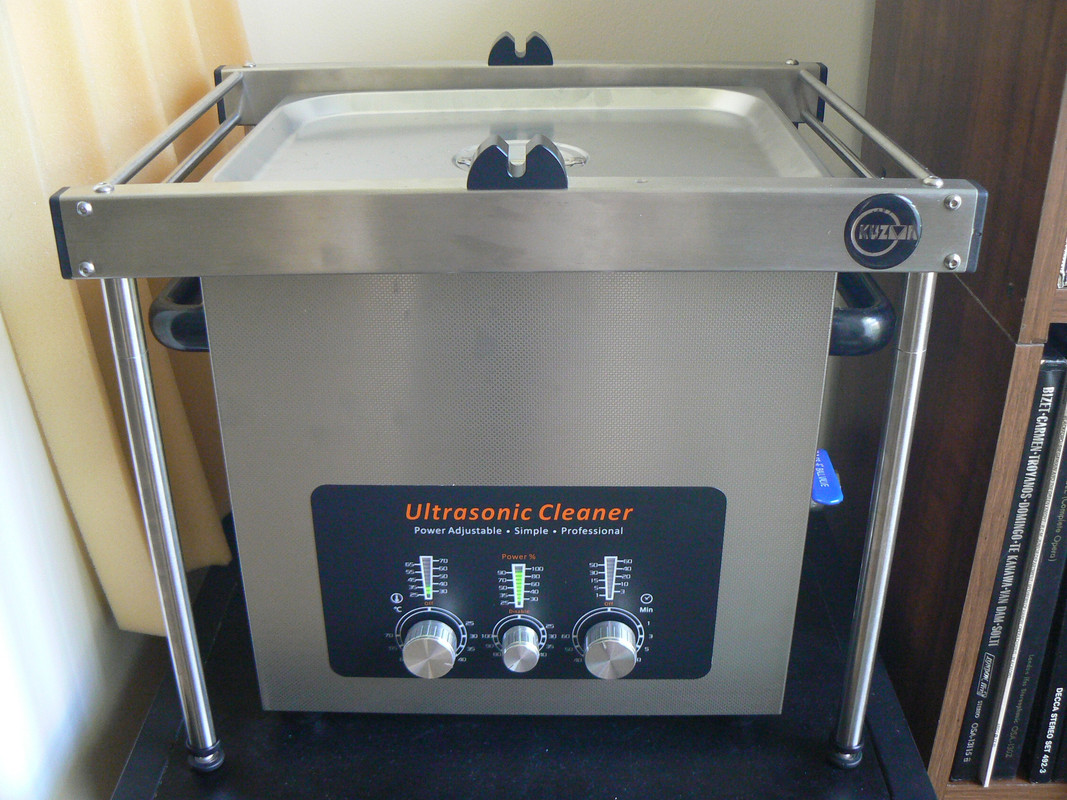
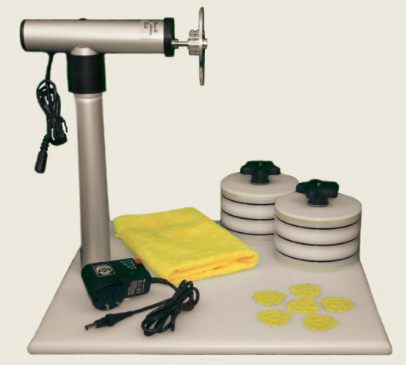
1. I used a 10 liter container ("bath"), which is manufactured in China (picture below). It has the same liquid capacity of the model my associate used, but the dimensions of my model were slightly different. This difference allowed me to clean 11 records simultaneously, while my associate's machine was "only" capable of cleaning 9 records at a time. Both machines had timers, temperature controls and, most importantly, power controls (see below).
2. The settings I used with my ultra sonic machine were basically the same as my associate. I used the same temperature (33 C), around the same power (80%, based on video evidence of his machine in operation), but the cleaning time was a little longer (15 to 20 minutes) because I had (22%) more records to clean.
3. I used the exact same cleaning solution as my associate: two gallons of distilled water (Walmart $ .68/gallon), plus some Isopropyl alcohol and a few drops of surfactant (Photo-Flo or Triton X-114). I continually replaced the alcohol and surfactant with every other cleaning, while the entire solution was replaced around every dozen or so cleanings. In effect, the solution cost of cleaning each record is around $ .01, which is basically "free" for an audiophile.
4. The records were air dried after removing them from the "bath" and shaking off any excess fluid. It takes around 30 minutes to an hour to dry them, depending on the temperature and humidity of the room. I usually gently brushed the records to remove any remaining loose dust particles and then placed the records back in their original sleeves. It's very easy to create a simple routine to make certain that the records go back into their original sleeves.
5. It is also important to note that, like my associate, all the records I cleaned with this protocol were either brand new or had been previously cleaned with a standard RCM.
The machine is turned on around 15 minutes prior to use to reach the proper fluid temperature. The On/Off switch is in the back. The three front controls, left to right: Temperature, Power and Timer.
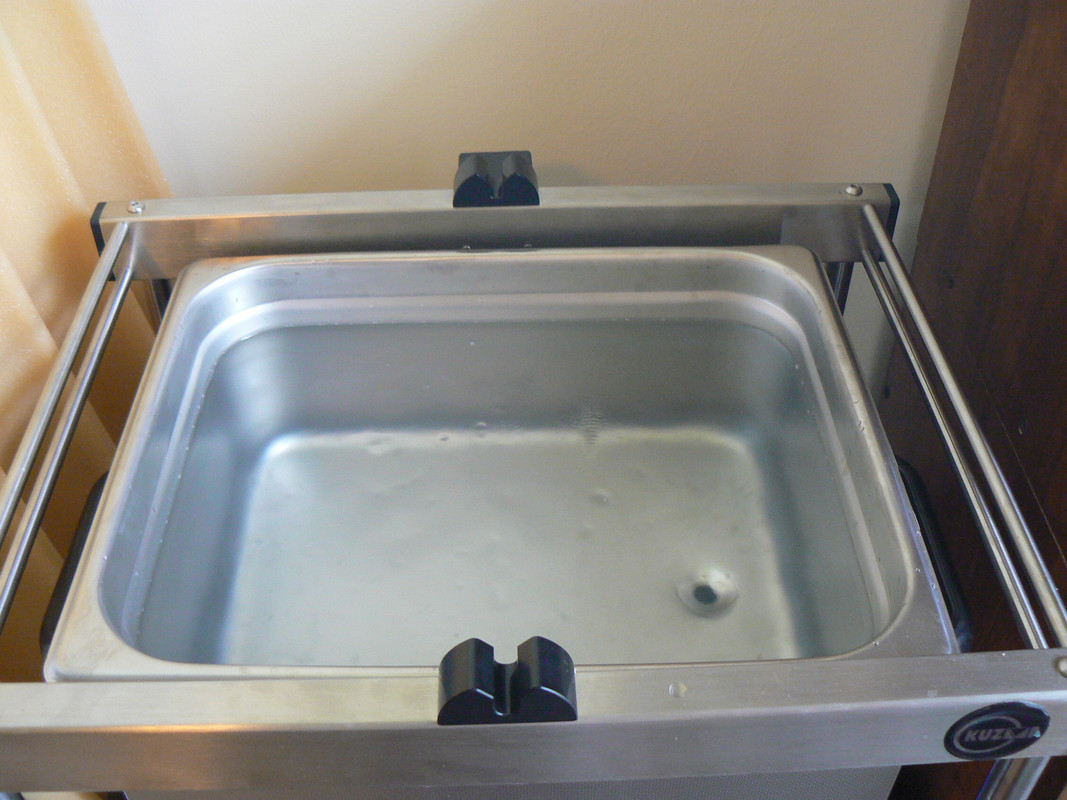
This is the inside of the machine before the records are placed in the bath, with the ultra sonic devices turned "On". The visible ripples are the result of the ultra sonic vibrations.
The Kuzma's specific function in the cleaning process is now clearly evident. The On/Off switch for the Kuzma is in the back. The records rotate at the speed of around 1 RPM.
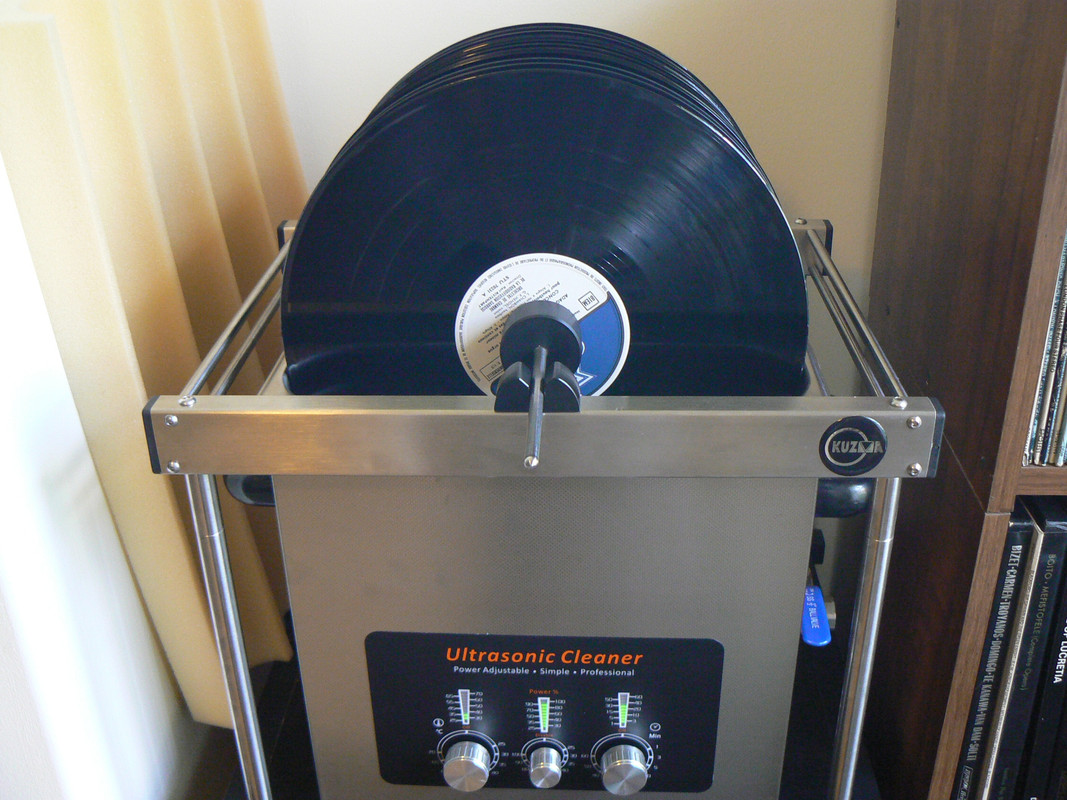
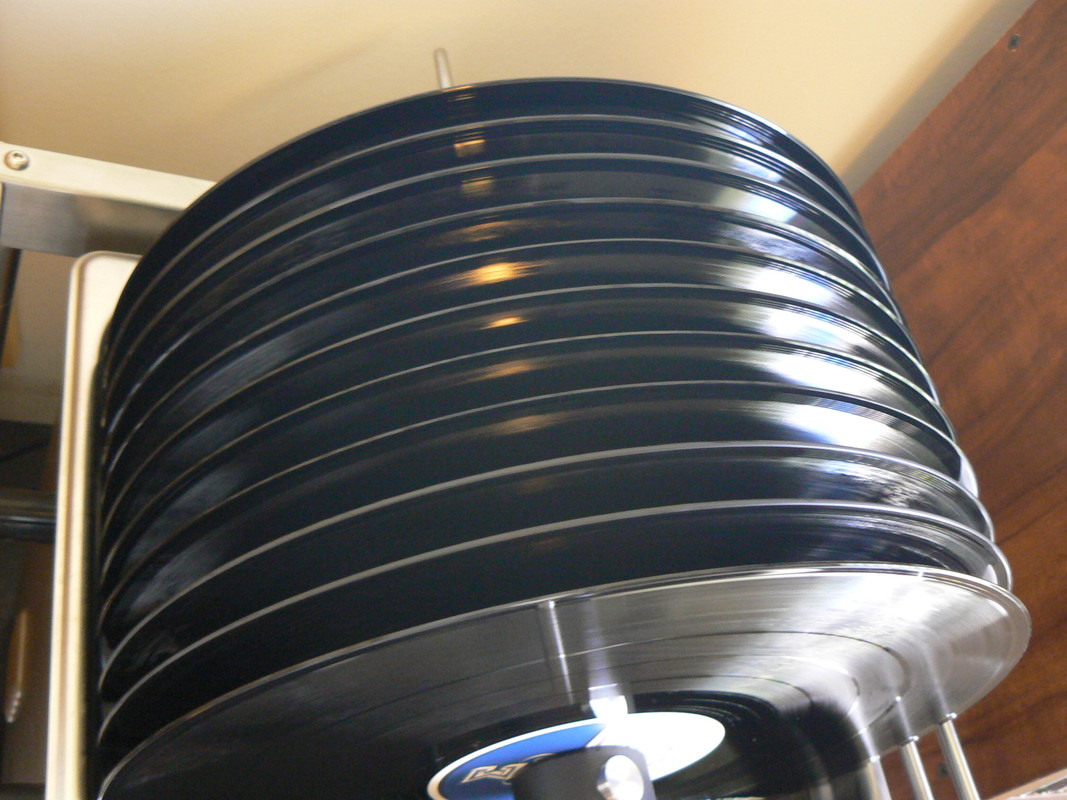
It is important to make certain that no record is touching the side of the bath, which will stop its rotation, while still maximizing the depth of the LP that is in the bath. The space between the two outside LPs and the parallel bath wall is around 1.5". The current spacing between records is .5", while some prefer a 1" spacing (link below).
There are currently available two basic methods of ultra sonic record cleaning:
1. Cleaning multiple records simultaneously, usually with a DIY type device (such as the Kuzma) working in conjunction with a generic ultra sonic machine or
2. Cleaning one record at a time, using a custom machine dedicated just for that purpose (which are usually expensive because of the poor economy of scale). The most famous models are Audio Desk and KLAUDiO.
None of us has had any direct experience with method #2, but it should be superior for One-Step cleaning, assuming it is implemented properly, with the caveats of extra costs in both time and money. The #2 machine itself, because of its greater mechanical complexity, will also inevitably require more service and common maintenance (plus it will have more breakdowns). Still, for those audiophiles who have the required funds, I can understand the demand for this type of machine, since it should produce outstanding results as well as its convenience when having to clean only a single LP (a common experience, especially if you have regular visitors).
For most audiophiles though, method #1 will be the best practical and economical choice, and there are also a growing number of models as well to choose from. In particular, I, along with my associate, can enthusiastically vouch for the Kuzma. The Kuzma is very well built, well thought out and versatile. I've also seen other models (links below), though none of them, so far, match all the Kuzma's strengths, but they do have an advantage in cost, which can be critical for some.
As for the ultra sonic "bath", my industrial model (seen above) works well and it's economical. However, I had a serious problem with the model my associate is using, causing the delay of this article, though his version has worked fine. This problematic model has now been discontinued, so it is irrelevant at this point. There is also a complete USC from Poland that looks interesting and is also very economical. There will be links to all of these models, and others as well, below.
1. Are there any other benefits with USC besides improved sonics?
Yes!
1. There is much less record static. In fact, there is basically no static charge that I can notice after the cleaning and air-drying. This is in stark contrast with the same records before the USC process, when my arm hair literally would stand on end when close to the records stacked on the Kuzma spindle.
2. It is rare now to see "dirt" on the stylus after playing an LP which has been ultra sonically cleaned. Before USC, there was usually visible debris on the stylus after play, even with new records and/or those records cleaned using the standard method. (I still clean the stylus after each play though, just to make certain, or maybe it's force of habit.)
3. Records look cleaner than you have ever seen them (even when new), which may be an aesthetic pleasure for some.
4. Records have a longer play-life after USC, which should be obvious and, accordingly, they should also be more (monetarily) valuable (see below).
2. Are there sonic differences in the results based on the record manufacturer or when the LP was pressed?
None that any of us have observed, so far. The improvements we've heard are as described above on all the labels and all years of pressings. We can state this observation though: In general, the better the LP was originally (before USC) in sonics, the greater the noticeable improvement, which makes sense. However, I have noticed something unusual: "Digital Records" (LPs with Digital Master Tapes) seem to be particularly improved, though more experiences/tests are still necessary for confirmation of this observation.
3. Is ultra sonic cleaning new technology?
Sadly, no. Ultra sonic record cleaning, particularly Method #1 (which we are using), could have been technologically accomplished decades ago. Of course, that means we've been using a compromised and incomplete record cleaning method for almost 40 years, but there's nothing we can do about it now. The good news is that USC does exist now, with numerous options, and it can be economical.
4. Does USC obsolete "standard" record cleaning machines, such as those from VPI, Nitty-Gritty etc?
No, but! Ultra sonic cleaners, using Method #1, are not good for really dirty records (those with smudges, fingerprints, oils etc.). Only standard RCMs, utilizing quality cleaning fluids and brushes, can clean records with foreign materials that are actually sticking to the surface. However, the ultra sonic cleaners, using Method #2, combine both cleaning methods, which is why they have an advantage and also cost more, and they DO obsolete standard cleaning machines.
USC should be thought of as the final step necessary to remove the last remaining (usually invisible) foreign materials from the record. On a personal note, while I sold my Clearaudio, I will eventually purchase another standard RCM. I still purchase the odd used record and their condition is always "a crap shoot" (a standard RCM can also quicken the drying time). There may be some audiophiles with entire record collections, either already cleaned with a standard RCM, and/or new and unplayed, who can get away with only an USC, but for everyone else I advise having both a standard RCM and an USC.
5. Does USC have any relevance with the use of the ELP (the laser turntable)?
Yes, both positive and negative. The ELP uses lasers that respond to even the tiniest of foreign particles, thus making them (annoyingly) audible. So, using USC is even more important for the ELP than a standard turntable system. In fact, I would say it is an absolute requirement. Ironically though, USC also makes a standard turntable sound more like an ELP, because of the reduction in surface noise and the resulting greater degree of intimate direct contact of the stylus with the inner grooves.
I, and my associates, came late to Ultra Sonic Record Cleaning, which I now regret, but I will do my best to make up for lost time. As of today, my main goal is to confirm that USC is indeed a real "breakthrough", even though the technology is many decades old. Further, there is no substitute for USC, as only USC can remove the final remaining foreign objects from the tiny grooves of the LP. I must also stress that the resulting sonic improvements do make a definite positive difference in "involving" oneself in the musical performance. Further, once these improved sonics are experienced, an audiophile can never go back, which to me is the ultimate test. However, there is arguably even a more important reason to celebrate USC...
Even if there were no audible improvements with USC, I would still be a strong advocate for its use, for one simple and fundamental reason: the resulting minimization of groove damage of the LP during play, which thus allows the record to be played the maximum amount of times without damage and sonic compromise. That reason alone, protecting our precious records*, makes USC well worth it. In fact, I no longer play an LP on my system unless it has been ultra sonically cleaned, knowing I would actually feel "guilty" if I did otherwise. I believe records, ultra sonically cleaned, and even those records still to be cleaned, are more valuable than ever before, because their "life expectancy" has now been increased.
*USC will also protect and extend the life of the stylus, another bonus.
The Bottom Line is simple: All serious audiophiles should use ultra sonics to clean their entire record collection, which for me, and my associates, has become a required project. I understand that some of the USC machines are unaffordable for most audiophiles (including me), but there are economical alternatives (see links below), and USC machines can always be purchased by a group if need be. As for myself, I not only plan to clean my entire collection, as I stated above, I will also experiment with different procedures and methods and report back on the results.
Over the past several months I've invested a fair amount of time exploring ultrasonic cleaning because I've fallen way too far behind in my record cleaning. With over 6000 LPs, I needed a faster way to clean than my trusted multi-step manual wet/vac cleaning process. That manual process got the best results I've ever found, but I was not keeping up with my collection and it is just painful to me to play a record that I've not cleaned.
In exploring ultrasonic cleaning, my hope was to find that I could complete multiple LPs in a single US cleaning cycle and greatly speed up my rate of cleaning records. My goals were to FIRST do no harm and then SECOND see how close I could get to the results of my manual cleaning regimen.
My past experiences with ultrasonic cleaning demonstrations were completely underwhelming. What I heard did not approach the excellence I was achieving with my multi-step wet/vac cleaning regimen. What I've learned, and now apply in my new ultrasonic cleaning regimen, are multiple elements to the cleaning process that must be used in combination to achieve the best possible results. And these results have far exceeded my expectations.
Credit where due: My results are the synthesis of a lot of work reported by others in a variety of online forums. I've certainly not come up with any of this on my own; I'm simply compiling elements that, when applied systematically in one cleaning regimen, give outstanding results. I've listed at the end of this report some of the online threads I've found particularly valuable.
Summary
I've now cleaned over 100 records using my new ultrasonic cleaning regimen and detergent solution for my tank. What I hear exceeds the quality that I've been able to achieve in the past with my multi-step manual wet/vac cleaning regimen, and this has surprised me given what I'd heard with ultrasonic cleaning demonstrations elsewhere.
The key characteristics that I'm hearing (using a 40kHz tank, DIY formulated detergent solution, 31-35 degree Celsius heating, approximately 3 revolutions in 10 minutes, double high purity water rinse, vacuum drying between rinses and filtering the tank water between each batch of LPs) are:
- Absolutely no audible damage to the grooves, no high frequency dulling or roll-off
- Dead silent background (on records not previously groove-damaged)
- Excellent reveal of transients, harmonic overtones and timbre
- A great sense of openness to the sonic image and soundstage
The critical elements to the process that makes for the improvements I'm hearing versus other rather non-compelling ultrasonic demonstrations I've heard in the past are:
- Using the right detergents/chemicals the US tank solution—this is critical.
- Tank water temperature in the 31-35 degree Celsius range (heat is your friend, just not too hot).
- Double high purity water rinse and vacuum dry.
- Tank water kept scrupulously clean by filtering between batches and then completely dumping and refreshing the tank solution after 30-50 records, depending on how dirty the records were.
- Rotation time and speed in the tank; 3 revolutions in 10 minutes is working well.
Cost
total investment (including ultrasonic tank, device to rotate multiple records in the tank, vacuum machine for drying the records, chemicals for mixing your tank detergent/surfactant solution) can be under $1,400.
Equipment
Here's what I'm using for a setup that cleans four records at a time…
- Trusonik 10L 40kHz Ultrasonic Tank, with drain (new on eBay for $199)
- Vinyl Stack Spin Kit for rotating up to 4 records at a time in the tank, variable speed, will work with any tank with the required minimum dimensions ($325 with the optional 4 LP spindles). Video demo: https://www.youtube.com/watch?v=9ukvU3I_AWI
- Vacuum record cleaning machine - I use a VPI which I already had; a new model HW-16.5 sells for $700; handheld vacuum wands for use with portable vacuums are also an alternative.
- Chemicals for mixing your own cleaning solution and sufficient for hundreds of records ($50-$60 depending on type and source, see recommended formula below).
- High purity water, available in bulk for as little as $0.39 per gallon.
Why only four records at a time? Why not eight or more? It depends on the size of your ultrasonic tank. With a 10L tank, records can be spaced an optimal 1" apart and not overload the capacity of the tank. Some are trying to fit records more tightly than 1" apart, but my research suggests strongly that they are overloading the cleaning capacity of their ultrasonic tank. If you want to do eight records at a time, get a 15L tank. If three or fewer records at a time works for you, you can get by with a 6L tank.
Why not use a 60kHz or higher frequency tank? Using a 60-69kHz tank should be fine; it might even be ideal given some of the technical data. I've not personally tested the difference, but Harry Weisfeld has. He bought one of each for testing and reports that he CANNOT HEAR any difference in the results. (See his report in the VPI forum thread.) I know I'm getting great results with my 40kHz tank and it's about $400-600 less expensive than any of the 60kHz tanks I could find. I'm also convinced that a 40kHz tank does no harm to the vinyl. It's the frequency tank used in a number of commercially sold ultrasonic record cleaning machines and I've not seen any reports of problems.
What brand ultrasonic tank? Be careful in buying a decent quality ultrasonic tank. Some people report disappointing results only to find that their ultrasonic tank is underperforming because of inadequate design and parts quality. But, cost is not the only indicator of quality. There are inexpensive ultrasonic tanks being sold that are still good quality. Check the brand and do some research. In the U.S., many people are having good results with the Sonix brand. My Trusonik tank is made in China but seems well built and many people have used this brand now for a number of years with good results. A small manufacturer in South Carolina is building excellent 40 and 69kHz tanks under the Vibrato LLC name (but lacks a drain).
Cleaning Solution for Tank
The cleaning fluid in your tank is critical. Many people try to use only water, or water and some isopropyl alcohol, or a bit of Photo-Flo, or a bit of clear dishwashing solution – NO, NO, NO. You will not get the best results. Ultrasonic cleaning is not the magic by itself. The cleaning solution is the magic. The ultrasonic cavitations are just your gentle scrub brushes to help dislodge the contaminants that the cleaning solution is breaking up.
Use a detergent/surfactant meant for the purpose. This means one of the Tergitol variants as recommended by the Library of Congress in its record cleaning preservation formula and by the Canadian Conservation Institute. So, this is: Tergitol S-15-7 (LOC); or a combination of Tergitol S-15-3 and S-15-9 in a 50/50 proportion (CCI); or Triton X-100 (another Tergitol variant).
Also, add a quat (short for quaternary ammonium cation) that will provide antimicrobial properties and strong antistats. The antimicrobial is for longer term storage of your solution and cleanliness of your tank, recycling pump and filtration. The antistats will reduce static on your records. It just so happens there is an excellent commercial cleaning solution that formulated principally of quartz and is available from both Amazon and Staples (of all places. It's called Hepastat 256 and it's sold for hospital and office cleaning services. For an excellent discussion, read the AudioKharma post from an audiophile chemist who recommends this Hepastat ingredient that I've included in my formulation.
Formula for Tank Cleaning Solution
Largely derived from the information provided the chemist posting variously as guest110, vince1 and phantomrebel in the AudioKharma thread Record cleaning- you're doing it wrong!, my cleaning fluid formula for ultrasonic record cleaning today is:
0.13% Tergitol S-15-3 and S-15-9 in a 50/50 proportion (or use Triton X-100 as a simpler alternative)
0.10% Hepastat 256 (a 1:1000 dilution)
5.00% isopropyl alcohol (using 91% grade)
As the chemist in that AudioKharma thread has recommended, I'm finding it useful to premix the Tergitols with some alcohol and to make up enough in advance for several US tank refills. In my case, I'm making up a 4 oz bottle's worth of solution (about 118 ml) that will give me enough concentrated mix for four 2-gallon US tanks when I add the additional alcohol as part of setting up the tank. In milliliters this solution is:
40.00 ml Tergitol
30.00 ml Hepastat 256
48.00 ml Isopropyl to top out the bottle at 118 ml
118.00 ml total as a base solution
This combination neatly fits into one the those readily available 4 oz (118 ml) blue storage jars and is enough to mix up four 2-gallon US tanks using 29.5 ml of the combination per tank and then adding another 400 ml of 91% isopropyl to each tank to reach the 5% alcohol concentration.
Sources for chemicals used in the formula above: It is difficult to purchase the Tergitol S-15-7 (LOC recommendation) unless you are a laboratory or have someone at a lab who will order it for you. However, the other ingredients are readily available for ordering online:
Tergitol S-15-3 and S-15-9 – Talas in Brooklyn NY sells and ships to individuals.
See: http://talasonline.com/Tergitol-15-S-3-and-15-S-9
Triton X-100 – also available from Talas or from Amazon. This is an alternative to the Tergitol variants above and I'm told it will work well, but I've not tested it.
See: http://talasonline.com/Triton-X-100
Hepastat 256 – Staples online for delivery to your local store for pickup has the best price I've found. See: http://www.staples.com/Brighton-Professional-Hepastat-256-Disinfectant-Cleaner-Quick-Mix-1-Gallon/product_760086
95% Ethyl Alcohol (Ethanol) – Reagent grade, used in final rinse as discussed below. Be careful what has been used to denature the Ethanol so it can be sold legally without payment of an alcoholic beverage tax. Look for either methanol or isopropyl as the denaturing additive, not something else that may harm the vinyl. Available from Amazon. See: https://www.amazon.com/gp/product/B01ETU4BB0
91% Isopropyl Alcohol – many pharmacies sell it. Walmart has the best price I've found at $2.58 per quart.
Storage and handling of the chemicals: The Tergitol is expensive enough to want to preserve as long as possible and it won't keep indefinitely if bacteria gets into it. So, good practice is to keep all the chemicals and mixing containers as clean and sanitary as possible. Most of us can't duplicate sterile storage conditions, but we can improve things. Here's what I'm doing;
- The 100% Tergitols – stored in sealed containers in the refrigerator to reduce any risk that some bacteria that likes to feed on proteins will decide to start growing in the storage bottles. Also, I only draw from the 100% Tergitol bottles using a disposable sterile pipette to minimize any risk of getting bacteria into the storage container.
- The 100% Hepastat 256 – stored at room temperature, as is the isopropyl alcohol.
- The base solution mix – stored in sealed jar at room temperature since it has the Hepastat 256 in it that will prevent any bacteria from growing.
Water Quality and Sources
For mixing up the tank cleaning solution, any good quality distilled or reverse osmosis filtered water is probably fine. But I prefer to use water as close to Type 1 Reagent Grade water as I can find at a low cost for mixing this tank solution. For my two rinse steps, I do use Type 1 Reagent Grade water. DON'T STINT ON GETTING HIGH PURITY WATER! It is the next step in removing contaminants from the record surface because the high purity water binds those contaminants readily and allows them to be removed as the water is removed in your vacuum drying step. High purity water is critical to both ultrasonic cleaning and the multi-step wet/vac cleaning processes. So, this is nothing new just for ultrasonic cleaning. Good sources of excellent high purity water are:
- Whole Foods Market bulk dispensed deionized water for $0.39 per gallon is near Type 1 Reagent Grade water. The company that provides and maintains these dispensers in the Whole Foods Markets in my area is Fresh Pure Waters and they describe their filtration process at their website. They also provide and maintain bulk water dispensers in other organic food stores in the U.S. and Canada.
- Fish and Aquarium stores that specialize in salt water or coral growing aquarium supplies. I'm told the salt water aquarium stores often have high quality multi-stage filtration systems that generate near Type 1 Reagent Grade water.
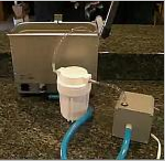
Filtering the Solution in the Tank
The tank solution needs to be kept scrupulously clean. Remember, all of the contaminants coming off our records are being suspended in that tank solution. But dumping a re-filling the tank with cleaning solution with each batch of records is not very economical or time efficient. So, use a filtering process in between batches of records. I've set up a small in-line pump with filter canister containing a 1 micron polyester filter. My setup follows a design posted by bbftx on the diyAudio forum, with some minor adjustments due to parts availability.
Video here: https://www.youtube.com/watch?v=NLHGLx3qrvY
Discussion here: http://www.diyaudio.com/forums/analogue-source/218276-my-version-ultrasonic-record-cleaner-13.html#post3215289
Step-by-Step Cleaning Process
My cleaning regimen now looks like this:
- Mix 2 gallons of cleaning solution for the tank using the formula above, add to tank
- Degas the water in the tank by running ultrasonics for 10 minutes while also turning on tank heater to bring water temperature up to 30 – 35 degrees Celsius. Do this before adding records.
- Mount records to be cleaned on spindle and attach the spindle to the Spin Kit rotating at 3 revolutions over 10 minutes in the tank water. Use tank timer.
- Remove record spindle and dismount records one at a time for rinsing.
- Rinse on vacuum cleaning platform (e.g., a VPI HW-16.5) using a highly pure water. Vacuum dry.
- Re-rinse a second time using the Final Rinse Water described below and vacuum dry.
- Set record aside to finish air drying any remaining moisture not removed by the vacuum, then place in clean inner sleeve.
Final Rinse Water
I do a double rinse. The first rinse is with high purity water sourced in bulk. But the second rinse is special. The second rinse is with Type 1 Reagent Grade water to which I've added a small amount of Reagent Grade 95% Ethyl Alcohol (Ethanol) to make up not more than 3% of the rinse solution by volume (3 parts to 100). The addition of the Ethanol makes a subtle but consistently heard improvement in the cleaning results as compared to the Type 1 Reagent Grade water by itself. The Ethanol is a surfactant so the final rinse can actually get into the record groove. It is a further cleaning/degreasing agent. It readily binds with anything remaining in the grooves. And it aids in drying.
Why use Ethanol rather than Isopropyl? I use the Ethanol because I've been told that it is a more volatile alcohol than Isopropyl and even more readily binds with other molecules due to having one less carbon atom. Hey, I'm just repeating like a parrot here.
Online Discussions that I Relied on in My Research
- AudioKharma – Record cleaning- you're doing it wrong! – Started by an audiophile chemist who shares what chemicals are likely in the commercial cleaning products we've used, what chemicals and detergents we should be using, and WHY. Look for posts by the chemist under the various monikers: guest110, vince1, phantomrebel (long story dealing with trolls as to why the several monikers). Much of the focus is on cleaning solutions for manual cleaning processes, but the posts in 2016 have included a lot of discussion for applying these solutions to ultrasonic cleaning. The recommendations from the chemist in this thread were my sources for the formula I'm now using (as I've described above).
- diyAudio – My version of an Ultrasonic Record Cleaner – Started by bbfxt who is a tremendously creative and talented tinkerer. Largely focuses on diy solutions for adding multiple record rotation capability to a commercially purchased ultrasonic tank, not how to build the ultrasonic tank itself. Lots of good examples and contributions from many contributors, but principally from bbftx.
- VPI Forums – Record cleaning – Started by Harry Weisfeld to share his experience with ultrasonic cleaning beginning with his doubts about it rolling off high frequency information and then with changing with Harry's conviction that ultrasonic was not rolling off high frequencies "when done right." Good information shared by the man himself. His conclusions are what convinced me to forge ahead in this exploration. Over the past two years, this thread has taken on a life of its own with very robust contributions from many music listeners. Top
An Important Advancement...
The Degritter is the most evolved ultra sonic record cleaning machine that I and my associates are aware of at this time. It is, for now, the state-of-the-art record cleaning device. I've also spent extensive time researching the Degritter on the Internet, reading every anecdotal experience directly concerning the machine. These anecdotes have, unanimously, confirmed our positive experiences. In fact, it may not be possible to surpass the Degritter's performance for now with any current record cleaning technology known to me. Next, the important and relevant supporting details...
I have been cleaning my records with an ultra sonic system (the Kuzma) since 2016 (see above). Like many other serious audiophiles, I immediately experienced the easily noticeable sonic improvements when records are properly cleaned with an ultra sonic device, even if they were previously cleaned using any of the long popular wet/dry machines. I also immediately recognized that ultra sonic cleaning was an absolute "Requirement" for all records, and not just another marginal, or even useless, "audio luxury" that one could safely ignore.
However, as much as I liked the Kuzma cleaning system (which could clean up to 10 records simultaneously), I eventually realized that it still required a true drying system for optimization. I discovered that air-drying the records (which Kuzma recommended) tended to leave tiny particles stuck on some LPs, which were difficult to see and remove, no matter how clean was the dedicated drying room. Accordingly, I decided I also needed another device which was dedicated to drying the records.
After some research on current trends in the record cleaning market, I originally planned to purchase an Okki Nokki wet/dry cleaning machine, to augment the Kuzma. However, in the end, I decided to purchase the Degritter instead, and below are the reasons which explain this decision.
I first learned about the Degritter on Audiogon (in the "Analog Forum"), and I was almost immediately intrigued with it. I then made the mandatory Google search/investigation, reading every article and/or post I could find about the Degritter. I waited a few months before I made an irreversible move. I wanted to be as absolutely certain as possible that there would be no long-term problems with this (newly designed) machine (especially considering that the Degritter is manufactured in Estonia).
Several important attributes sold me on the Degritter (all of them anecdotal at that point): The owners/users claimed it had an unparalleled cleaning potential, even when directly compared to its best known (and reviewed), and much more expensive, competitors. It also had a small "footprint", and was highly flexible and convenient to use. The pleasantly surprising fact that it was also around $ 2,000 less expensive than other competitive "all-in-one" models was obviously another critical factor.
I was also impressed by the short Degritter videos posted on-line, as well as other pertinent details and information I found on Degritter's website. Further, while this is admittedly only a subjective feeling, I came to believe that the creators of the Degritter began their project with no "dogmas" or prejudices, and eventually utilized any technology, and/or methodology, they felt would work best.
What ultimately convinced me was that the Degritter was designed explicitly, and dedicated only, for cleaning records and nothing else. In aggregate, my entire investigation gave me the confidence that the Degritter cleaning machine had been extremely well thought out from the ground up and, just as important, the end results of this process had been verified through thorough and vigorous testing. Accordingly, I made the monetary commitment* and the Degritter arrived in November 2019.
*I received around a 20% accommodation discount as a veteran audio journalist.
Before discussing the cleaning details and results, I must first reveal the current state of my (3,000+) record collection, which is very pertinent to my experiences and personal perspective on record cleaning.
When I received the Degritter, every single LP I owned had been already cleaned on either the Kuzma DIY devices and/or an older wet/dry system (VPI, Nitty-Gritty, Clearaudio etc). This includes all the records I ever purchased brand new (and even the LPs I now have "for sale", which I do NOT count as part of the 3,000+ collection). On the day the Degritter arrived, I would estimate that around 40% of my collection had been cleaned with the Kuzma ultra-sonic system, while the remaining 60% were cleaned only using a traditional wet/dry system.
To make any comparison as fair and objective as possible, I listened to a wide variety of records before the Degritter arrived. After the Degritter arrived, and I was both confident it was working properly and familiar with its operating protocols and options, the majority of my direct comparisons were between records previously cleaned with the Kuzma system, and then cleaned once again with the Degritter. The "Big Question" was obvious: Could the Degritter improve on the already outstanding Kuzma system (which had previously proved to be superior to any wet/dry system I've ever had)?
The answer came quickly: Yes, the Degritter even improved the records previously cleaned on the Kuzma system. These are the details...
The sonic differences were generally minor between these two machines, but are still easily noticeable, and that's what counts. If I had to put these differences in numbers, I would say that if the Degritter is removing 100% of what is only possible to remove on a LP when using an ultra sonic machine (in contrast to a wet/dry machine), then the Kuzma system removes around 90% of that same material, depending on the record.
This small difference equates to sensing that last degree of sonic and musical "directness" and "nakedness", which is important to many audiophiles, plus another noticeable reduction in standard record noise. When using descriptive audio terms which are more normal; this equates to a slightly lower sound-floor, where a little more musical and hall/studio information is both heard and sensed, and with the further bonus that the recording may sound a little more realistic at softer volume levels (which is also very important to many listeners, including me).
It must also be emphasized, even though it is obvious and self-evident, that a "perfectly" cleaned record will still have some extraneous sounds, mainly from LP damage from previous play and also the defects from the original pressing. Sadly, no cleaning machine can ever reverse and eliminate these problems.
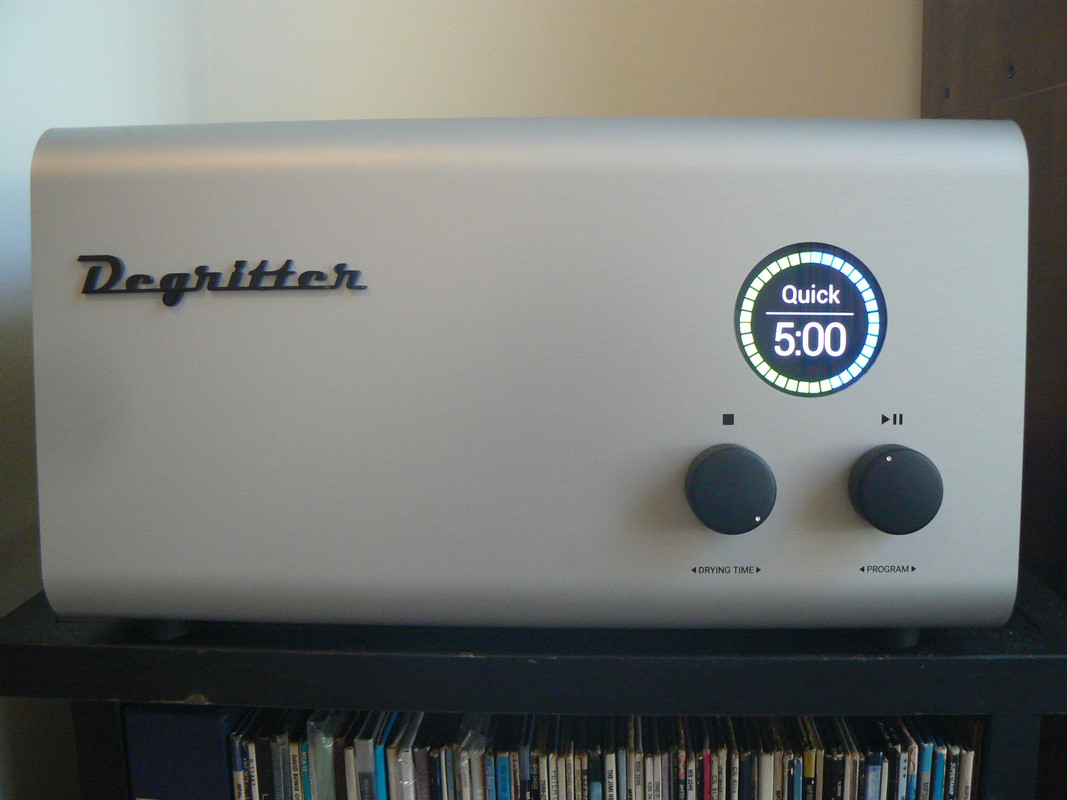
For the records previously cleaned on the Kuzma system, I chose the "Quick" cleaning option (5 minutes total cleaning time, including the drying cycle). For those records cleaned only with a wet/dry system, I chose the "Medium" cleaning option (6.5 minutes). Finally, for those rare records that either had an unknown cleaning history, or I knew (through my notes or memory) to be unusually "noisy", I chose the "Heavy" cleaning option (9.5 minutes).
In a few instances, where the records had foreign objects stuck on them, I utilized a hand-held brush to remove them during the cleaning cycle (while the LP was wet). This experimental method duplicated a standard wet/dry cleaning machine, and was successful in removing the foreign objects.
Further, whenever I used the "Heavy" cleaning option multiple times (within a short period of time), the resulting rise in water temperature was noticed by the Degritter's internal sensors. Prudently, a "fail-safe" mechanism would be triggered if the increased temperature was considered dangerous to the LP being cleaned. If so, the Degritter then "cooled" the water by taking extra time during the cleaning cycle (with clear notification on its right-side digital display), with the ultra sonic devices shut off during that cooling period.
Important Note - The differences in cleaning times between these three options is dedicated only to the cleaning cycle, which means the drying time is exactly the same for all three options. The drying time can also be adjusted depending on how much noise you can tolerate during the drying cycle. So, to be clear, the louder the drying noise, the quicker the drying finishes.
Price Disclosure - According to my correspondence with Degritter, the current (2020) cost of the Degritter is now $ 3,000, which includes shipping to the USA.
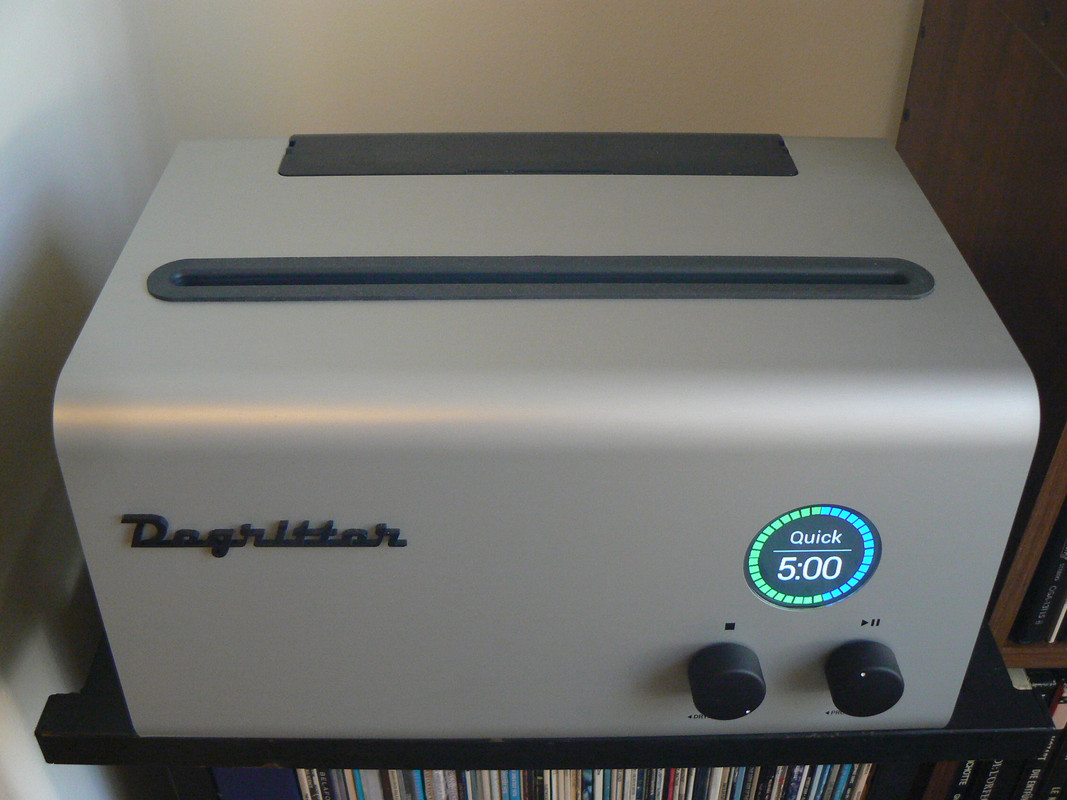
One "Issue" - I had one small problem with the Degritter. The guide/roller on the right hand side of the LP slot (see pictures) was slightly skewed and off-center (the left hand side was centered correctly), so the record could get wet when it was removed. Degritter relayed some simple instructions and I was able to reposition the roller slightly, which solved the problem.
The Degritter is the most effective record cleaning machine I have ever used. I only wish the Degritter (and ultra sonic record cleaning itself) was available decades ago, since the basic technology existed back then, even if it would have been somewhat cruder in its appearance and ergonomics.
What is important to focus on is this: The designers/manufacturers of the Degritter have appeared to consider all of the critical factors of ultra sonic frequency, positioning and water temperature, filtering etc, which are relevant to optimizing the cleaning of records, and the outstanding results that we (and many others) have experienced are the ultimate proof that they were correct in their choices.
From a really broad perspective, the Degritter even shares one highly desirable attribute with the Accapella Ion Tweeter. How? The Degritter is one of those ultra-rare devices that could be considered "a final purchase", because there is no remaining available option for further improvement. I find this highly satisfying, both in practical terms and emotionally as well.
In short, the Degritter does everything it is supposed to do, does it as well as it can be done, and is an unsuspected pleasure to use. It is also upgradeable with easy to install firmware upgrades, and even shuts off automatically, when unused, to save power. I find it difficult to think of something even more to ask for at this time, but I promise I won't give up trying.
No cleaning machine, no matter how great its efficacy, and no matter what its price, is the best choice for all audiophiles and for all situations. There are too many variables between LP collectors for only one solution to satisfy all of them. The Degirtter is the best cleaning solution for my record collection at this time, and I assume for the rest of my life. In fact, I literally can't even imagine another machine which would better suit my current and future requirements. This may be the case for many other serious audiophiles, but certainly not for all of them. Here are the other common record cleaning options:
Classic Wet/Dry Machines - Such as VPI, Nitty-Gritty, Okki Nokki and more expensive models from manufacturers like Keith Monks and Clearaudio. These machines, if used on their own, are now the bare minimum required for all serious record collectors because, even at their best, they don't (and can't) equal the cleaning ability of any decent ultra sonic machine. However, they are not obsolete and, in fact, are still a requirement for almost all owners of DIY Ultra Sonic machines. Why? For two reasons:
1. A good ultra sonic machine may not be able to remove the heavy-duty "gunk" found on many used records of unknown origin (from yard sales, Goodwill, record stores and the Internet). These records may require a wet/dry machine to provide a true "scrubbing" for any chance of recovery (assuming the gunk removal is even possible in the first place, which it sadly isn't in many instances). In this "worst case scenario", consider ultra sonic cleaning only as the ultimate and final step in the cleaning process. (This was my own reality for decades.)
2. Wet/dry machines are also a necessity for all the DIY ultra sonic machines which require quick drying (see below). This means that wet/dry cleaning machines, for two good reasons, will be around indefinitely but, again, should not be used on their own.
DIY Ultra Sonic Machines - Such as the Kuzma and now countless other versions available on the Internet. This option is best for those owners of large record collections, in generally good condition, but have never been previously cleaned by ultra sonics. This was my own situation just before I purchased the Kuzma system (and also the situation of one of my associates, who recently purchased the Kuzma system from me). Almost all DIY machines have one huge and critically important advantage over any other cleaning device...
They have the capability to clean multiple records simultaneously. Accordingly, these machines are the most practical solution for large (and growing) collections. Further, they are also relatively inexpensive, making them the best bargain in record cleaning machines. It is then no wonder why they are so popular at this time. DIY is obviously the best choise if the goal is to clean as many records as possible, as good as practically possible, in the shortest period of time, at the least expense, and all of this, incredibly, at the same time.
However, as I experienced myself (and as I discussed above), a basic wet/dry machine is still highly recommended to augment the DIY machine (in fact, I believe it is a requirement). Such a machine is required for quick drying and also for cleaning those records in truly awful condition, where physical brushing may be a necessity.
Self-Contained and Dedicated Ultra Sonic Machines - Such as the Degritter, Audio Desk and other similar models. These designs provide the highest level of record cleaning currently available at this time, along with the most convenience. They are also the most expensive option. The Audio Desk even provides standard brush cleaning as well (though for an extra financial cost and greater complexity). (01/2020)
Relevant Link:
A reader sent me some information concerning another modestly priced ultra-sonic record cleaning machine. Here's his letter, with some minor editing and my bold:
"I have been following your analysis and conclusions with regard to Ultra sonic cleaning of LPs and finally took the dive. I purchased a HumminGuru unit on the used market from a gentlemen who "upgraded" to a Degritter. As you most succinctly pointed out the magic is in the cleaning fluid not the sonic cleaner. So, I utilized the L'Art du Son cleaning fluid and distilled water that I was previously using with my VPI 16.5 cleaning device.
The HumminGuru is so simple to use since it has a 400ml reservoir that I add 4ml of L'Art du Son cleaning fluid to. I microwave this solution to 90 degrees Fahrenheit before emptying it into the HumminGuru machine. I place the LP in the machine and run it through a double cleaning cycle (5 minutes) followed by an auto mode deep cleaning cycle (5 minute clean plus 5 minute dry).
I utilize the solution one more time for a second LP after microwaving the solution to 90 degrees Fahrenheit and emptying it into the machine. I discard the solution after two uses and start with a fresh 400ml batch. This process has yielded great results for my LPs that have been previously cleaned with my VPI 16.5 and the same L'Art du Son cleaning solution.
I have confirmed with another expert audiophile friend of mine that the noise floor has been noticeably lowered with almost zero surface noise and the following immediate changes:
1. More decay on most instruments and voices
2. More micro details on plucked strings, voices and cymbals
3. Better dynamic attacks
4. Better separation of voices and instruments (they seem to have their own spaces). The cymbals on Steely Dan's Aja are now shimmering, metallic and well defined. Before sonic cleaning they were just a shushing sound that you guessed were cymbals.
All in all, this has been a great improvement to my entire LP collection. I have been spending many hours cleaning many albums. However the nice part is I have the machine in a separate room from my listening room and I can actively listen to music and just remember every 5 minutes (the first cleaning cycle) and every 10 minutes (the final cleaning and drying cycle) to check in on the progress of the cleaning process. My nightly listening sessions have the added benefit of yielding 6 to 10 more rejuvenated LPs.
My next adaptation of this process is to try the cleaning solution that your group is using: Triton X-100, Hepastat 250, Isopropyl Alcohol and distilled water. Not sure if it can get any better than this but who knows.
... The HumminGuru unit is very reasonably priced and facilitates small batch cleaning with out a lot of setup or tear down. This made the process very easy and manageable. Thanks again for the info that spurred me on to take action.
P.S. Your recommendation regarding the Esoteric X-03 replacing my Oppo 105 was a life changing event in listening to CDs. The addition of an Audionote 4.1 DAC took me to another level of digital nirvana for both CDs and streaming through a Logitech Squeezebox Touch. Not replacing vinyl, but the digital realm has gotten a far sight better and less digital in nature." (08/22)
Relevant Link:
A reader sent me some information concerning the cleaning agents which are commonly used with many ultra-sonic record cleaning machines. Here's his letter, with some minor editing and my bold:
"(A) possible correction. I saw the cleaning formula for the ultrasonic cleaner*. I am quite familiar with the ingredients in the cleaning solution, but I think Hepastat 250 should actually be Hepastat 256. I don't think that there is a Hepastat 250.
Also with regards to Hepastat 256, if that is actually the correct material. People should use thick nitrile gloves and safety goggles when mixing the concentrated material. It isn't just acutely toxic orally; it is also acutely toxic dermally, which means it can absorb through the skin. There is some ethylenediame materials that make it readily absorb into proteins. I worked with some diazo compounds that have a somewhat similar structure. You have to be careful with handling when they are concentrated." (12/22)
*The reader is referring to the cleaning formulas discussed above.
TopVPI Record Cleaning Forum This is long and also informative
Audio Kharma Thread This is also informative
Audiogon Thread A further discussion of Rush Paul's Important PF Article
DIY Audio Thread An Incredible 154 Pages! Many subjects; heat, frequency etc.
Audio Desk Ultra Sonic Cleaner
Kuzma Audio The USC Adapter that my associate and I are currently using
Digiprotek The Hong Kong manufacturer of the USC Cleaner that my associate and I are currently using
Ultra Sonic Records The V-8 USC Adapter/Cleaner
Cleaner Vinyl Another USC DIY Adapter
Groove Clean An alternative USC DIY Adapter
Audio Revita A Complete USC Machine from Poland
Vinyl Stack USC Adapters and Kits
Vibrato USC Tanks Made in U.S.A.
Ultrasonic Cleaners Excellent Overview of the Types, Uses and Benefits of Ultrasonic Cleaners
These are all the best USC information and supplier links I can find at this time. I will continue to look for other relevant USC links. I would also appreciate assistance finding USC "missing links" from readers.
ACCESSORIES (Including Record Cleaners and Cleaning Fluids)
TopIf you have a question, or want audio advice and/or consultation:
Important Notice- As of October 1, 2012, there is a minimum fee of $ 10 for me to answer a simple enquiry, which means any question that I can answer quickly without research. Anything else will cost more and I will accordingly provide quotes for approval. PayPal is being used for its convenience, universality and security. If interested, click on "Ask Arthur".
There are two exemptions to the payment fees. 1. Those readers who have provided an important service (usually information that was posted) to this website over the years. 2. Those situations where I feel that I overlooked something important and/or was obscure in my post, and thus some necessary clarification is required on my part. That will always be gratis. I don't believe in being unfair or petty, especially to my own readers.
Telephone Conversations- If a reader feels it is necessary to actually talk to me directly, this can be arranged if I also feel it is appropriate. There will be a minimum fee of $ 50. Ask for the details before paying the fee.
Finally, a veteran reader wrote that I "should also have a link for (generic) donations to keep the website going". I replied that the Donation button can also be used by appreciative readers for that purpose. Needless to say, any unsolicited donation from a generous reader receives my sincerest thanks and gratitude.
To contact me for any other reason:
COPYRIGHT 2024 ARTHUR SALVATORE